You can ensure that required attributes are assigned to services by configuring the Tag Compliance policy, so that you can keep track of who is incurring service costs. When configuring the attributes required for tag compliance, you can choose from:
- all configured custom attributes (except those that apply only to request forms)
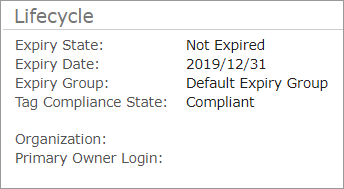
- Expiry Date
- Primary Owner
A service is considered compliant if:
- No tag compliance policy has been configured.
- A tag compliance policy has been configured and the required attributes have been set.
- A tag compliance policy has been configured, a VM has been cloned, and the required attributes on the VM have been verified.
You're notified that a service is non-compliant in the following situations:
- when a tag compliance policy has been configured and the values for required attributes aren't set (Non-compliant: Incomplete)
- when a tag compliance policy has been configured and a VM has been cloned (Non-compliant: Unverified). In this case, although the VM has the same attributes as its parent, the VM must be verified, as detailed in the next section.
The tag compliance policy changes the tag compliance state for templates, and policy actions are also performed on templates. It's possible to deploy a VM from a template in the Non-compliant state.
Make services compliant
You can make a service compliant if you're notified that it's Incomplete or Non-compliant: Unverified.
Access: | Views > Inventory > Infrastructure, Applications, or Storage |
Available to: | Administrator and All Operator Levels of Access Rights |
- Navigate to a service in the tree or in a table, and do one of the following.
- For a VM, select Actions > Policy Enforcement > Set Tag Compliance Data.
- For all other service types, select Actions > Set Tag Compliance Data.
- In the Set Tag Compliance Data dialog, provide a value for each attribute.
- Click Verify/Save.
- In some cases you may receive warning messages when you try to set tag compliance data and must take further action.
This message: | Occurs when: | Action to take: |
|---|---|---|
No tag compliance policy is defined. | You've selected a service that isn't governed by a tag compliance policy. | To set tag compliance data for the service, configure a tag compliance policy as shown below. |
Selected services are not governed by the same tag compliance policy. | You've selected a group of services that are governed by different tag compliance policies. | Select only those services that are governed by the same tag compliance policy. If you've selected templates in the Infrastructure view, deselect the templates. |
Configure the tag compliance policy
Use this policy to identify services that don't have required attributes assigned to them. The policy can notify administrators of issues about the service and can take automatic actions on the service.
Any configuration of this policy on a system-wide basis can affect all cloud accounts that are managed by Commander now and can affect all cloud accounts that are added to Commander in the future. If you don't want any cloud account to be automatically affected by this policy, configure the policy by selected infrastructure elements only, instead of the root Infrastructure view or root Applications view.
Setting metadata through command workflows: You can create a command workflow to set values for attributes that you require for services to be deemed compliant. You can then attach that command workflow to a tag compliance policy. Whenever a service becomes non-compliant, the tag compliance policy will run the command workflow to reset the attribute values, automatically ensuring tag compliance.
Access: | Configuration > Policies |
Available to: | Commander Role of Superuser and Enterprise Admin Administrator Access Rights |
- On the Policies page, click Add.
- On the Choose a Policy page, choose Tag Compliance from the list of policies, then click Next.
- On the Policy Name/Description page, enter a name and an optional description, then click Next.
- On the Choose a Target page, from the Target View Type list, select Infrastructure or Applications.
If a VM is deployed into a location where multiple policies target the Infrastructure view and the Applications view, the policy targeting the Infrastructure view takes precedence.
- To select the target you want the policy to apply to, expand the Infrastructure or Applications tree if required, and select the infrastructure elements you want.
- On the Tag Compliance page, select one or more attributes from the list.
You can choose from all configured custom attributes (except those that apply only to request forms), plus Expiry Date and Primary Owner.
- On the Configure the Policy page, to configure the policy but keep it turned off until you're ready to enable it, make sure Enable policy is unchecked.
- From the Take Action menu, select what should occur after you enable the policy and then the policy is triggered:
- Notification Only — No action is taken for the service. An alert is created, notifying you that the policy has triggered. See also Subscribing to Policy Alerts.
- Quarantine — The VM is quarantined if the policy is triggered.
Note that if you include this action in a policy targeting services in a cloud account other than vCenter, the action will fail.
- Suspend — The service is suspended.
Note that when a service is suspended, you're saving it in its current state so that you can work with it later in the same state. Suspend isn't supported for VMs in public cloud accounts. If you include this action in a policy targeting services in a public cloud account, the action will fail.
- Stop — The Guest OS is shut down.
- Run <Workflow> — Run the selected workflow.
Click Add Workflow to set up a new command workflow.
- Choose either or both of the following options to send alerts:
- To generate an alert in vCenter, enable Generate vCenter Alerts.
- Select the number of hours for the Grace Period.
The grace period is the period of time that's allowed to elapse before the tag compliance policy acts on a service. For example, if a grace period of 18 hours is selected and if a new service is created without all the required attributes, 18 hours will elapse before the tag compliance policy acts on the service.
- Decide whether to allow children of the targets to have their own instance of the policy and optionally disable this setting.
If you enable this option, other instances of this policy can be applied to any infrastructure elements and services that are children of the parent infrastructure element you've selected (an override).
- On the Summary page, the summary of your policy options appears.
If you've enabled the policy and as a result, any services are going to be immediately affected by it, Commander displays the number of affected services.
To see what services are affected by the policy actions you selected, click Review, then click OK to return to the summary.
- Click Finish to complete the configuration.
Your policy options are now set in Commander.
