Web Configurator
Use the Web Configurator tool to manage the database connection and license keys in Snow License Manager, and to configure automated imports.
Start the Web Configurator
Open the Windows Start menu, and then select Web Configurator.
The Snow License Manager - Web Configurator appears showing the tabs Database, License, and Import Service.
Manage database connection information
In Snow License Manager - Web Configurator, select the Database tab.
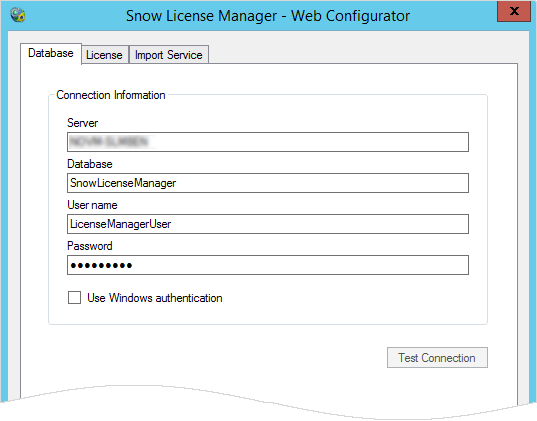
Under Server, Database, User name, and Password, verify the connection information for your Snow License Manager database.
If you change the database connection, make sure to use an account with sysadmin privileges. This is needed to ensure functionality both in the web user interface of Snow License Manager and in Snow Management and Configuration Center.
Select Use Windows Authentication or leave it cleared to use SQL Server Authentication instead.
To verify the database connection, select Test Connection.
If you have made changes you want to save, select Apply. Otherwise, select Close.
Activate Snow License Manager
Before you can start using your Snow License Manager installation, you need to activate the product. As long as it is not activated, the Activate button appears under Product License, next to the license information.
Note
Most commonly, the activation is done over the internet. If your server is not connected to the internet, you can request an activation key from Snow Software support by creating a case through the Snow Support Portal with the product License key and the Hardware ID attached.
In Snow License Manager - Web Configurator, select the License tab.
Select Activate.
In Product Activation, do one of the following:
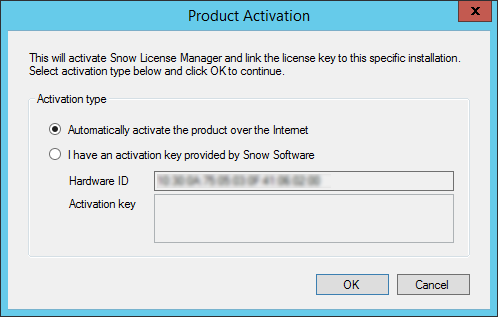
If your server is connected to the internet, select Automatically activate the product over the Internet.
If your server is not connected to the internet, and you have requested and received an activation key from Snow Software support, do the following:
Select I have an activation key provided by Snow Software.
Enter the Hardware ID and the Activation key.
Select OK to save and close Product Activation.
Select Apply.
Change license keys for Snow License Manager
In Snow License Manager - Web Configurator, select the License tab.
Under Product License, in License Key, enter the new license key.
Select Apply.
Add modules
You can add modules that require their own license keys, for example, the Software Recognition Service and the Oracle Management Option.
In Snow License Manager - Web Configurator, select the License tab.
Under Modules, click Add.
In Module, do the following:
In the Module list, select the module you want to add.
In License Key, enter a valid license key for the selected module.
Select OK to save and close Module.
Select Apply.
Remove modules
You can remove modules that require their own license keys, for example, the Software Recognition Service and the Oracle Management Option.
In Snow License Manager - Web Configurator, select the License tab.
Under Modules, select the module you want to remove.
Select Remove.
Select Apply.
Use the Import Service
You can use the Snow License Manager File Import Service for automated and regular imports of data to Snow License Manager. The service is configured on the Import Service tab of the Web Configurator.
For detailed information on how to configure automated imports, see Automated imports.