Snowboard
The Snowboard shows a quick overview of status and alerts. The overview is provided using widgets, that is, small objects with tools and content of various nature. There are two types of Snowboards:
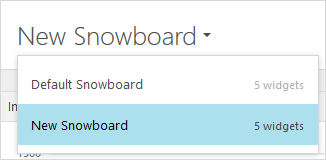
The Default Snowboard is accessible to all users. It can neither be edited nor deleted.
A customized Snowboard is only accessible to the user who created it. A user can create several Snowboards, and switch between them on the Snowboard menu.
By default, all Snowboards are presented in view mode. To be able to change the appearance or content of a Snowboard, it must be set in edit mode which is done on the Snowboard menu.
Create a new Snowboard
A new Snowboard can be created either from scratch or by using an existing Snowboard as basis.
On the context menu, click Create Snowboard.
The Create Snowboard dialog box appears.
Type a name for the new Snowboard.
To use another Snowboard as basis, select the Copy from an existing Snowboard check box and select the Snowboard from the Select Snowboard list.
Click Save.
The new Snowboard is created.
When the Snowboard is created from scratch, an empty Snowboard will be displayed. However, if an existing is used as basis, the new Snowboard will be populated with the widgets of that selected Snowboard.
Edit a Snowboard
To add, move, resize, edit or remove widgets, the Snowboard must first be set in edit mode:
On the Snowboard menu, click the Snowboard to be edited.
On the context menu, click Edit current Snowboard.
The Snowboard is set to edit mode.
Note
If navigating to another page in Snow License Manager while the Snowboard is in edit mode, the Snowboard will return to view mode, and changes made to the Snowboard will not be saved.
Add widgets
Click Add widget.
The Add widget dialog box appears.
In the Type step, click to select a widget type.
In the Widget step, click to select a widget.
In the Settings step:
Optionally configure the selected widget. Available properties depend on the selected widget type. The content of the widget will be adjusted to the selected Size.
Optionally type a filter criterion to filter the data the widget is based on. Use % as a wildcard character.
Note
Widget settings can also be changed later on, see Edit widget.
To return to a previous tab, click Type or Widget.
To add the selected widget, click Add widget to Snowboard. The widget is added to the Snowboard.
Repeat the steps to add more widgets.
Click Save to save the changes and return to view mode.
Move widgets
To move a widget within a Snowboard:
Drag the widget to the new place.
Click Save to save the changes and return to view mode.
Resize widgets
Point to the icon in the top left corner of the widget
 , and then select a new size.
Click Save to save the changes and return to view mode.
Edit widget
Point to the icon in the top left corner of the widget
, and then click Edit widget.The Edit widget dialog box appears.
Configure the settings.
Click Apply changes.
Click Save to save the changes and return to view mode.
Remove widgets
Point to the icon in the top left corner of the widget
, and then click Remove widget.Click Save to save the changes and return to view mode.
Share a Snowboard
Snowboards can be shared with other users or partner customers to facilitate for example introduction of new users or customers. All Snowboards, except the Default Snowboard, can be shared.
To share a Snowboard means that you create a copy of the Snowboard and the copy is then added to the selected user's Snowboard menu. The copy and the original Snowboard are not connected. Neither changes to the original Snowboard nor changes to the copy will affect one another.
On the context menu, click Share Snowboard.
The Share Snowboard dialog box appears.
Keep the original name or enter a new name in the Name box.
Select the users that you want to share the Snowboard with.
Click Share.
The shared Snowboard appears on the Snowboard menu for the selected users.
View data
To show the data the widget is based on, click View data.
If the data is filtered, then the filter criterion is shown above the list of data:
If a wildcard was used when filtering the data, that is, the data contains the filter criterion, the symbol
 is shown together with the filter criterion.
If no wildcard was used when filtering the data, that is, the data is equal to the filter criterion, the symbol
 is shown together with the filter criterion.
Delete a Snowboard
To delete a Snowboard, the Snowboard must be set in edit mode.
On the Snowboard menu, click the Snowboard to be deleted.
On the context menu, click Edit current Snowboard.
The Snowboard is set to edit mode.
Click Delete Snowboard, and then confirm the deletion.