Configuration of Zoom
The Snow Integration Connector for Zoom is used for finding the following information about an organization’s Zoom account:
Number of users
Each user’s base plan subscription
Login activity
All users registered on the Zoom account are displayed, except for those who have been manually deactivated.
Note
Partly due to missing functionality in the Zoom API and some limitations in Snow License Manager, this version of the connector is not supporting:
Special subscription plans, like Zoom for Education, Zoom for Developers or Zoom for Telehealth
Sub accounts
Paid add-ons
The configuration must be started and prepared according to SaaS connector configuration.
Prerequisites
Credentials for a Zoom account are required.
Create an OAuth app
The Client ID, Client Secret, and Redirect URL for your Zoom account are required as input when configuring the Zoom connector. To locate the credentials, the OAuth app needs to be created.
Log in to Zoom Marketplace: https://marketplace.zoom.us/
For the OAuth app type, select Create.
On the Create an OAuth app, do the following:
Enter an App Name.
Select the Account-level app.
Select Create.
Note
To avoid publishing your app on the Zoom app marketplace, you can turn off the toggle switch.
On the App Credentials tab, copy and save the values in Client ID and Client Secret to use when configuring the connector.
Note
You can regenerate the Client Secret on the App Credentials tab, in case your existing credentials are compromised.
Enter the Redirect URL for OAuth and save the URL to use when configuring the connector.
Example 15.http://localhost:{available port}Copy and add the redirect URL from step 4 to Add Allow List.
Select Continue.
On the Information tab, enter the mandatory fields:
Short Description
Long Description
Company Name
Developer Contact Information
On the Scopes tab, select Add Scopes and add the
user.read.admin.Select Continue.
In the Activation tab, to test the app activation, select Add.
Configure the Zoom connector
In the Configure Zoom section at the bottom of Connector Configuration: SaaS:
Enter the values for the Client ID and Client Secret, as noted in Step 4.
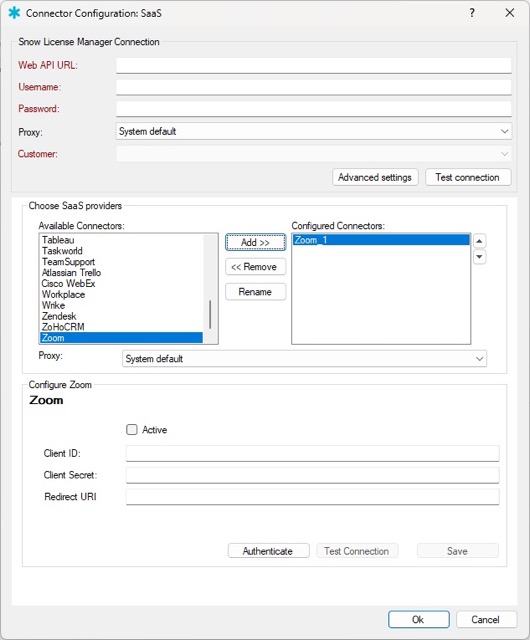
Enter the Redirect URI as noted in Step 5.
Select Authenticate. On the login dialog that appears, to authenticate the connector with your Zoom account, follow the login procedure.
A dialog will inform you that the authentication was successful.
Note
If you have trouble logging in, select Open default browser from the bottom of the login dialog. This opens the login page in your default browser instead.
After a successful login, copy the URL in the browser's address bar and paste it into the text box dialog that has appeared in SIM.
To verify the connection, select Test Connection.
If the connection cannot be established, verify that the connector has been configured according to Step 1 through Step 6.
To allow the data to be aggregated, select the Active checkbox.
Select Save. When the connector is configured, you can aggregate data from it or schedule an aggregation.