Create a Master Server instance
Note
If a new database is to be created via Snow Inventory Server Configuration Manager, a user account with sa privileges is required in the Database step.
Start Snow Inventory Server Configuration Manager (run
snowserverconfig.exe).On the Welcome page, select Create master server.
In the License Key step, enter the Company name to which the license key has been issued, and the associated License key.
Select Next.
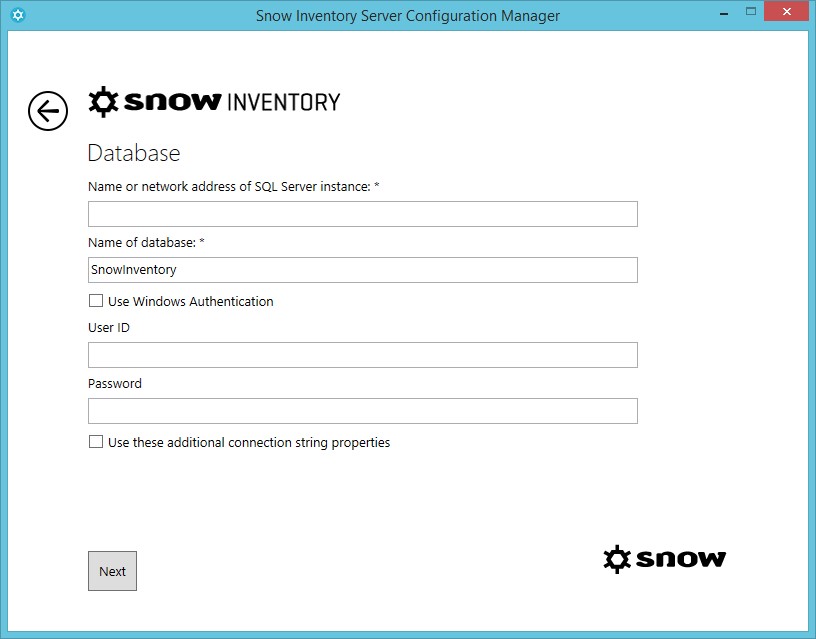
In the Database step:
Enter a Name or a Network address for the SQL server instance to be used.
In the Name of database box, enter the name of an already existing Inventory 6 database or the name of a database to be created.
Select one of the following authentication alternatives:
Select the Use Windows Authentication check box.
Enter User ID and Password of an SQL user account with permissions to connect to (or create) the database.
Important
If Snow Inventory Master Server is configured to use Windows authentication against SQL Server, the Snow Update Service client service must be configured so that it runs with the same user as the Master Server.
The Snow Update Service client GUI should also be run with the same account.
To add additional settings for the database connection, select the Use these additional connection string properties check box, and then enter the properties in the box that is displayed. Use semicolon as delimiter.
Select Next.
A connection to the specified database is established.
Select OK.
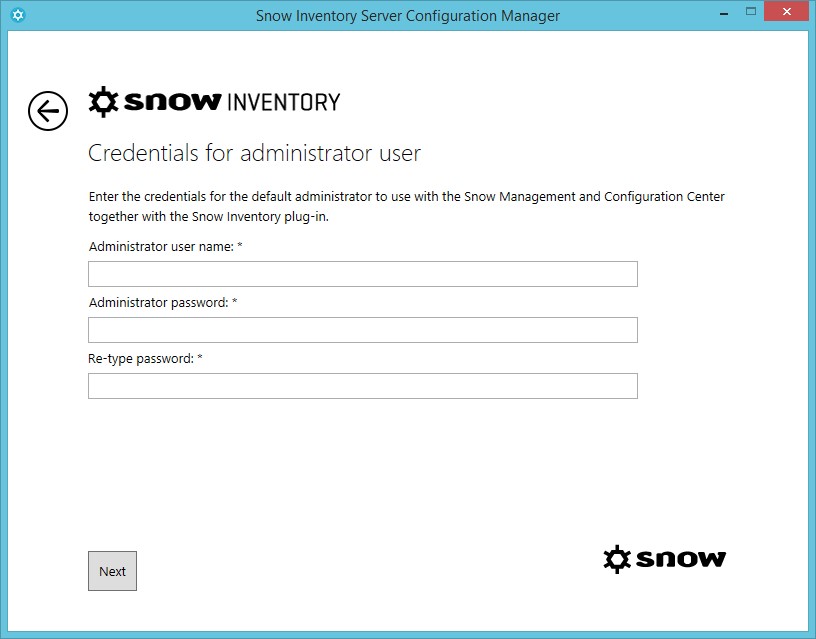
In the Credentials for administrator user step:
Enter an Administrator user name.
Enter the associated password in the Administrator password and Re-type password boxes.
This administrator account will be used as the default account for signing in to the Snow Inventory Admin Console.
Click Next.
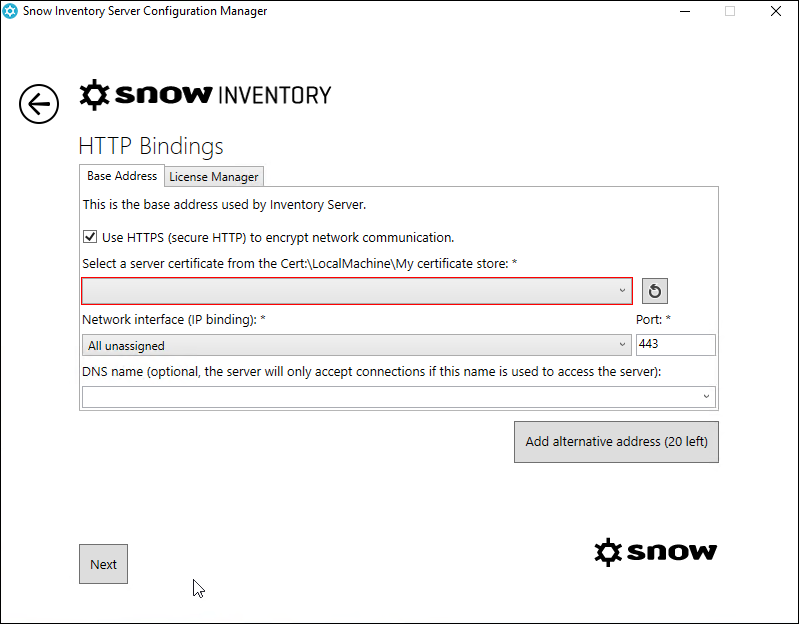
In the HTTP Bindings step for Base Address:
For HTTPS only: Select an existing certificate in the list.
Select Network interface and type a Port, if different from the default port. This is the binding used by Snow Inventory Server to receive data.
Optional: configure a DNS name that will be used to validate connections to Snow Inventory Server.
Note
If DNS name is configured, Snow Inventory Server must be addressed by DNS name (i.e. not by hostname, another DNS name, or IP address) for the connection to be accepted by Snow Inventory Server.
Note
If Snow Inventory Server uses the same network interface and the same port as another application on the server, for example Snow License Manager, DNS name must be configured with a unique name. This also applies to the binding for Snow License Manager (see 12 below).
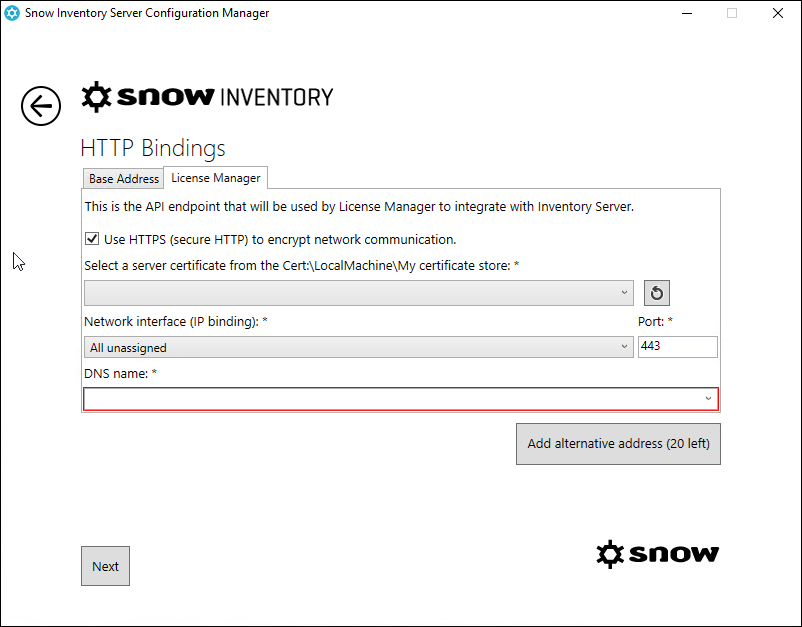
In the HTTP Bindings step for License Manager:
For HTTPS only: Select an existing server certificate in the list.
Select Network interface, type a Port and a DNS name that will be used for accessing this License Manager API endpoint.
Configure a DNS name that will be used to validate the connections to this Snow Inventory Server. This is mandatory for the License Manager endpoint and the server running Snow License Manager must be able to resolve the DNS name of this endpoint correctly.
Select Add alternative address to add more endpoints which Snow Inventory Server will use to receive data. Up to 20 alternative addresses can be added and will display in tabs to the right of the default tabs.
Select Next.
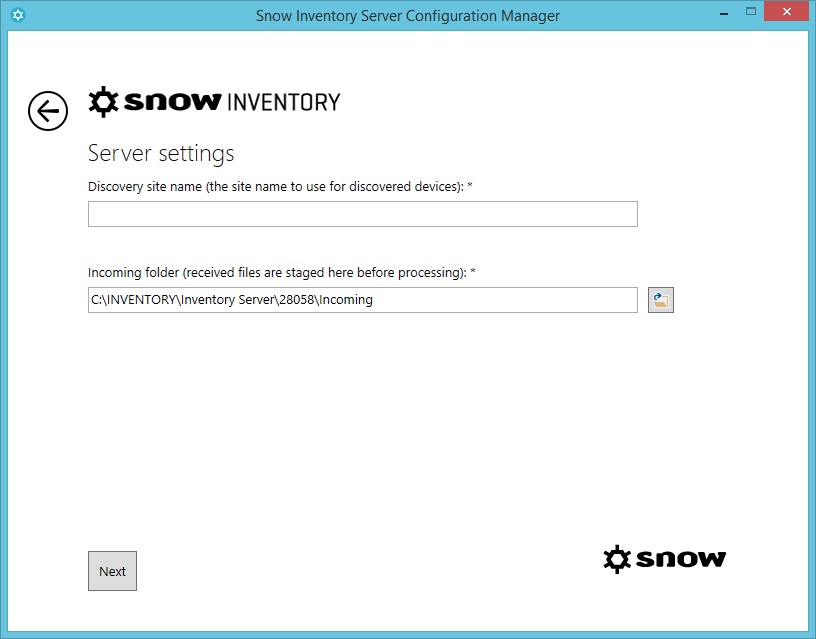
In the Server settings step:
Enter a Discovery site name. This site name will be used for this Snow Inventory server and for all discovered devices.
Enter the path to the Incoming folder where all inventory files will be received before they are processed in the database, or click
 to browse for the folder.
Click Next.
A Summary of the configuration is presented.
To create the Master Server instance according to the specified configuration, select Create.
To return to a previous page and make changes, select
 .
.