Manage auto connect rules
Learn how to view and create auto connect rules.
View auto connect rules for one specific organization node
On the Administration menu, click Organization.
In the Organization Structure list, click an organization node.
The created rules are displayed on the Auto Connect Rules tab to the right.
View auto connect rules for all organization nodes
On the Administration menu, click Organization.
In the Organization Structure list, click any organization node.
On the Auto Connect Rules tab to the right, select Show for all Organization nodes.
All created rules appears.
Optionally, to see which rules are created for which organization nodes, do one of the following:
In the Organization Structure list, click an organization node.
On the Auto Connect Rules tab, the rules for that node are highlighted.
On the Auto Connect Rules tab, click a rule.
In the Organization Structure list, the organization node for that rule is highlighted.
Create auto connect rules
To create an auto connect rule for an organization node, do the following:
On the Administration menu, click Organization.
In the Organization Structure list, click the node you want to create an auto connect rule for, and then click Edit Node.
The Edit Organization Node dialog box appears.
On the Auto Connect Rules tab, click New.
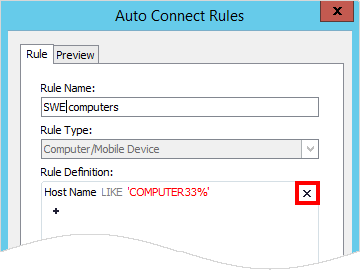
The Auto Connect Rules dialog box appears with the tabs Rule and Preview.
On the Rule tab, do the following:
Type a Rule Name.
Select a Rule Type in the list: Computer/Mobile Device, User, or Device.
Note
The auto connect rules are applied in the following order after resetting all records to the ROOT of the organization structure:
Computer/Mobile Device
User
Device
Consider this when creating your auto connect rules to make sure you get the results you want.
To add a new rule definition, click the + to the left in the Rule Definition box.
The Rule Definition dialog box appears.
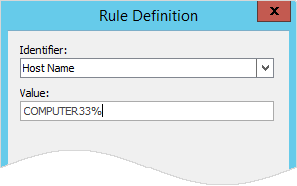
In the Rule Definition dialog box, do the following:
Select Identifier in the list. Available identifiers depend on the rule type selected in the previous step.
For rule type User, the identifier According to used computer will automatically connect the user to the same organization node as the computer that the user most recently used.
Type a Value for the Identifier. Use % as a wildcard character to create more flexible rules.
Click OK to save the rule definition.
The new rule is now listed in Rule Definition.
To see the result of the new rule, click the Preview tab.
Optionally, create more rule definitions to narrow down the rule. To remove a rule definition, click
 to the right of the definition.
Click OK to save the new auto connect rule.
Example: Create auto connect rules
In this example, we will create an auto connect rule called NameStartingWithServer that will automatically move all computers with a host name starting with SERVER to the organization node IT.
On the Administration menu, click Organization.
In the Organization Structure, click the IT node.
Click Edit Node.
The Edit Organization Node dialog box appears.
On the Auto Connect Rules tab, click New.
The Auto Connect Rules dialog box appears.
On the Rule tab, do the following:
In Rule Name, type NameStartingWithServer.
In the Rule Type list, select Computer/Mobile device.
In the Rule Definition box, click +.
The Rule Definition dialog box appears.
In the Identifier list, select Host Name.
In the Value, type SERVER% where % is used as a wildcard character.
Click OK to save the rule definition.
On the Preview tab, verify that there are no conflicts.
Click OK to save the new auto connect rule and close the Auto Connect Rules dialog box.
Click OK to save the changes for the organization node and close the Edit Organization Node dialog box.