Manage applications
After the new application has been created and saved, it will be available to select within Snow License Manager.
In the category menu, expand Software recognition, and then click Application definitions.
Click New Application.
The New Application dialog box appears.
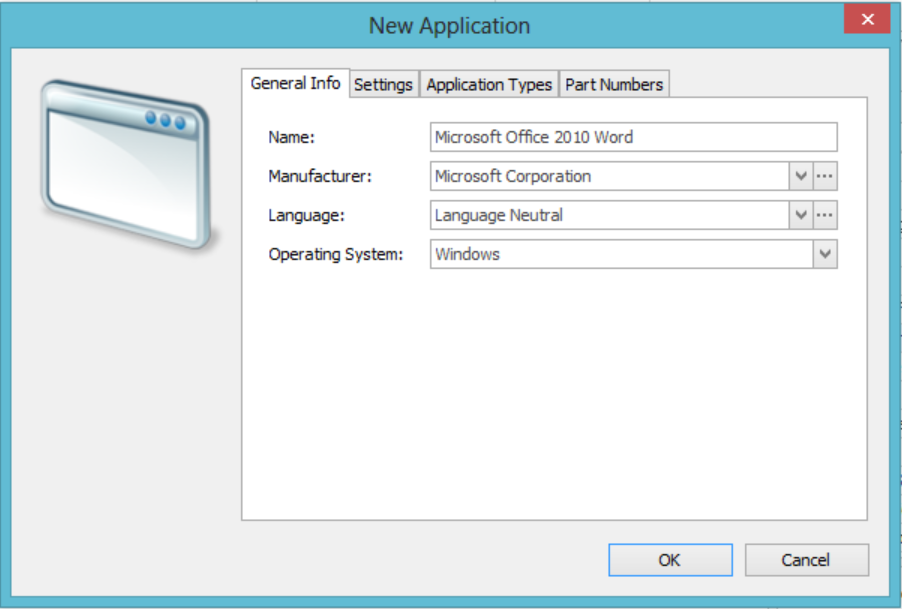
Type information on the General Info, Settings, Application Types, and Part Number tabs, see below.
Click OK to save the new application and close the New Application dialog box.
The new application appears in the Applications list.
General info tab
Type the Name of the application.
This is the display name that will appear in Snow License Manager.
Select application Manufacturer from the list.
Note
In case a particular manufacturer or language is not available in the lists, click
 to open a dialog box where a new manufacturer or language can be added, see Add manufacturer and Add language.
Select application Language from the list.
Default value is Language Neutral.
Select applicable Operating System from the list.
Default value is Windows.
This setting will drive the cross-platform licensing entitlement. This means, if you add a Windows-based application license in Snow License Manager, it will also entitle you to cover, for example, a Macintosh application with the same license.
Settings tab
Type information that enables Snow License Manager to automatically upgrade and downgrade the application within the application family.
For an application that belongs to an application family, select Application Family from the list. If there are multiple versions/editions of the application, this setting will group them together.
Type the Version Index.
The version index determines the upgrade/downgrade rights paths of the application.
Example 84.For version 4 of an application, type 10004 in the Version Index box.
Note
The Version Index is a licensing construct and does not reflect specific versions.
When applicable, type the Edition Index.
This setting will drive categorization of the editions, i.e. Enterprise, Standard, etc. for Cross Edition rights. If this is not applicable, then leave it blank.
Select the application Release Date from the list.
This setting will drive the entitlement of version upgrade rights.
For operating systems, select the This is an operating system check box.
To prevent the application from being displayed in Snow License Manager, select the Hide this application check box.
The setting is used when creating applications to be included in an application group. The setting is also used for so-called hidden applications, which is used for components, drivers, setup files, temporary files, etc. A hidden application allows SLM to recognize the software, but no application will be displayed.
When applicable, select the This application requires no license check box.
Application types tab
The application types are used for categorizing the application within Snow License Manager. Use the checkboxes to select one or several application types.
Part numbers tab
Register custom part numbers for the application, as specified by the software manufacturer or reseller.
To add a part number, click New.
The Part Number dialog box appears.
Select Type in the list.
Type a Part Number.
Click OK.
In the category menu, expand Software recognition, and then click Application definitions.
Select the application in the Applications list.
Click Copy Application.
The message Copy Rules appears.
Decide whether to make a copy with or without the associated rules.
In the category menu, expand Software recognition, and then click Application definitions.
Select the application in the Applications list.
Click Edit Application.
The Edit application dialog box appears.
Make the changes and click OK to save.
Select the application to be overridden and in the same process, create a new application that will be used instead.
In the category menu, expand Software recognition, and then click Application definitions.
Select the application to be overridden in the Applications list.
Click Override Application, or right-click the application and then click Override Application.
The Override Application dialog box appears.
Type information for the new application on the General Info, Settings, Application Types, and Part Number tabs, for details see Create new application.
Click OK to save the new application and close the Override Application dialog box. The new application is added to the Applications list and the overridden application is strikethrough.
In the category menu, expand Software recognition, and then click Application definitions.
Select the application in the Applications list.
Click Delete Application.
Click OK to confirm the deletion.
The application is removed from the database and all associated software is unassigned.