Manage lists
Lists are easy ways to manage and search for information in the everyday use of the SLM Web UI. There are three different types of lists;
List type | Description |
|---|---|
List all | This type of list is available for applications, computers, devices, mobile devices, users, agreements, and licenses. It generates a list containing all rows with selected information within the specific category. You can then sort and filter the information further. |
Search | All search results are displayed using lists. The difference compared to List all is that the content can be pre-filtered and searches can be saved for later use. |
Reports | For more advanced reporting purposes pre-configured stock reports are available in the Report section. These reports can be filtered and scheduled for automatic delivery. |
In lists, all rows are clickable and lead to the detail view of the selected computer, user, etc. When you return to the list, it will appear the same way as you left it, with any grouping and/or filtering applied.
All lists use paging by default, and they are cache-enabled which stores the initially loaded data. To reload/renew list contents, select Refresh on the context menu.
Filtering
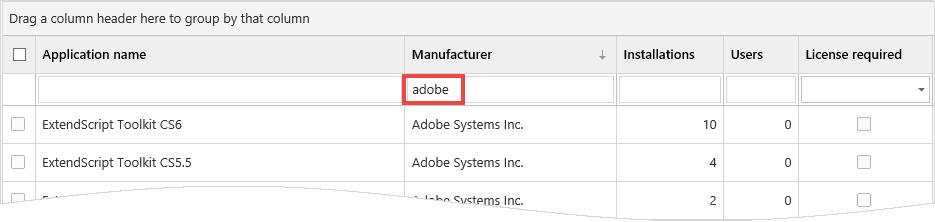
List contents can be modified directly using filters:
Type the filter criterion in the box below the column header (no wildcard character is required) and wait a second while the list is reloaded.
Only rows that match the filter are displayed.
Sorting
The list is by default sorted based on the first column, but can be sorted by another column.
To sort the list by another column than the first column, click the column header.
To reverse the sorting order, click the same column header once again.
A selected sort order is indicated by an arrow in the column header.

Grouping
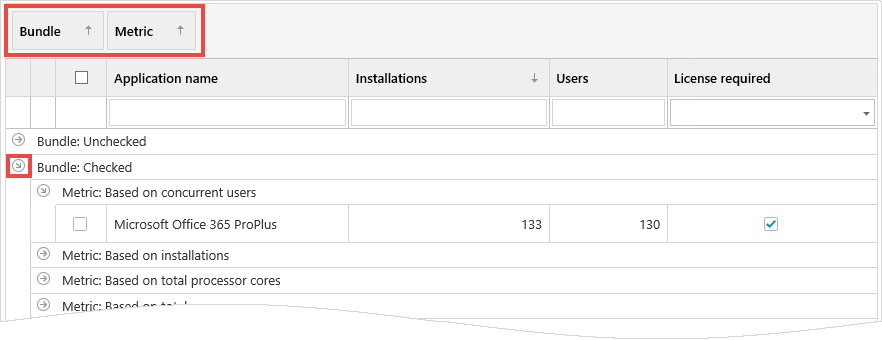
To group list contents:
Drag column headers to the grouping area above the list. The list contents can be grouped in several levels, by dragging two or more column headers to the grouping area.
Details of the group are hidden by default. To expand the group, click the arrow to the left.
Column selector
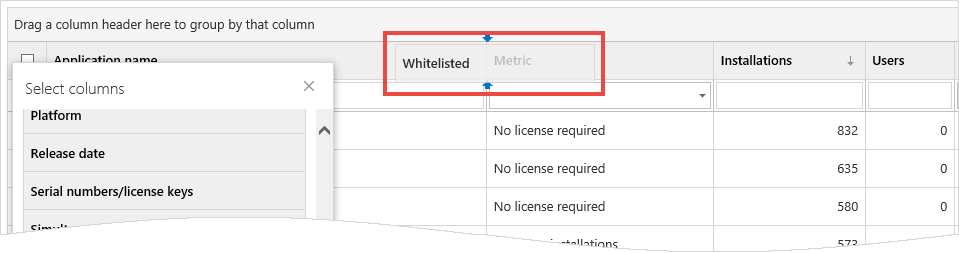
Use the Column selector function to add columns that are not displayed by default, or to remove unnecessary columns.
On the context menu, click Column selector.
The Select columns dialog box appears.
To add a column to the list, drag and drop the column to the list header.
To remove a header from the list, drag it back and drop it in the Select columns dialog box.
To close the Column selector dialog box, click
 in the top right corner.
Select all items
If the Select all check box at the top of a list is selected, only the items visible on the current page are selected.
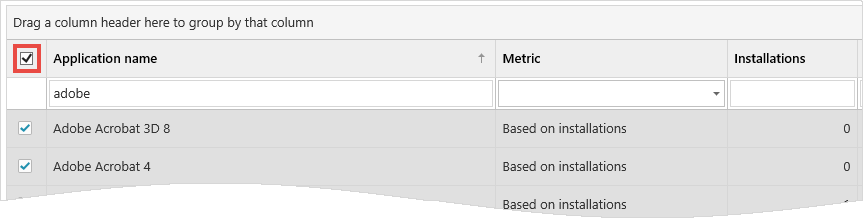
To select all items in a list with multiple pages, click the Show all pages  icon and then select the Select all check box.