Single server installation and configuration
This chapter describes how to install and configure the Snow Mobile Information Server for a single server installation.
Install Snow Mobile Information Server
Start the SDMServer[Version].msi, and then click Next.
Click to Accept the terms in the License Agreement, and then click Next.
Select Install, and then click Next.
Click Install.
Leave the Configure Server check box selected, and then click Finish.
Snow Mobile Information Server is installed and the SDM Server Configuration wizard appears.
Note
If the configuration wizard does not appear, or to perform a clean setup and configuration, start [InstallDir]\Tools\RvCfgWiz.exe.
Configure Snow Mobile Information Server
Configure the installed Snow Mobile Information Server components:
In the SDM Server Configuration wizard, select the features (Server, Services, WebApi, Mobility Manager and SelfService check boxes) to be configured, and then click Next.
Type License Name and Activation Code (provided by your local Snow contact).
Click Activate.
Configure the database:
Select MSSQL as database provider.
Enter the Server address by performing one of the following steps:
Type the server address in the Server box.
For a local SQL instance, click D, and then double-click the server to select it in the SQL Server Instance Discovery dialog box.
Select SQL Server authentication or Windows authentication and then perform the following steps:
If SQL Server authentication is selected, type User and Password.
If Windows authentication is selected, type User and Password or use a local user by selecting the Local System Account check box.
Note
For Windows authentication use either a local user or a user with the following privileges:
Access to the database.
Administrative rights on the local machine.
Rights to log in as a service.
Leave the information in the DB Shema and LogDB Schema boxes as is.
To connect an existing database for the DB Schema and/or the LogDBSchema instead of creating a new one, select the Use Existing Schema check box.
Click Validate.
Configure the server:
Leave the information in the Instance and the Clustername boxes as is.
Note
The Instance name is a subnet-wide unique name for this Snow Mobile Information Server Instance. Other services, such as Snow Mobile Information Server Gateway, will use this to automatically connect to the server. The instance name is set to the license name by default.
In the Password and Re-enter password boxes, type the password for the admin user.
In the Email and Re-enter email boxes, type the email address of the admin user.
Click Next.
Configure the service:
In the External Host box, type the DNS name of the Snow Mobile Information Server.
For normal installations, leave External Port box set to 443.
To allow the Snow Mobile Information Server to be reached on the External Host address, select the Enable external access for tools check box.
Click Next.
Start the configuration:
Click Start.
The log list shows the progress of creating the database, IIS site and settings.
To save the log list for troubleshooting, click Save Log.
When the setup is finished and configured, click Next.
Select the Start SDM Services check box, and then click Finish.
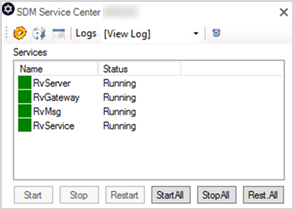
A script is started and the SDM Service Center appears.
All Snow Mobile Information Server services are started automatically as below.
The installed Snow Mobile Information Server is now configured.
Note
If the script fails to start, start the script from [InstallDir]\install_services.bat.
If the Service Center dialog box doesn’t appear, right-click the blue Snow Mobile Information Server Icon in the tray and select Show, or start the Service Center from [InstallDir]\Tools\RvServiceCenter.exe.
The Service Center tray application is by default set to auto-start. When the Service Center dialog box is closed, it is minimized to the tray. To display the Service Controller, right-click it and select Show to display. [InstallDir] is by default c:\Snow Mobile Information Server.
Setting up SSL server certificate
To enroll devices, as SSL server certificate must also be set up. The DNS certificate (SSL server certificate) is imported on the server via Snow Device Manager System Manager tool:
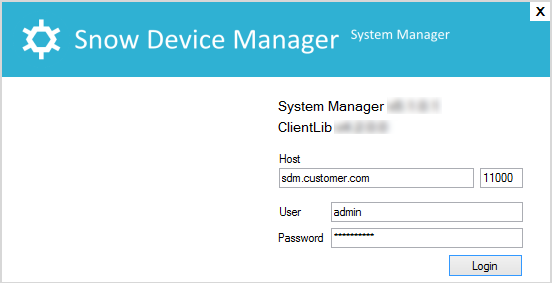
Click the R icon in the top left of SDM Service Center.
The Snow Device Manager System Manager tool appears.
Note
The Snow Device Manager System Manager tool might not start properly depending on the .NET version. If the tool does not start, install it locally and login from there.
Log in to Snow Device Manager System Manager:
If logging in from the application server:
Server address: localhost.
Port: 11000
If logging in from outside of the application server:
Server address: DNS
Port: 443
On the Global tab and on the Certificates tab, right-click the SSL_Server certificate, and then click Delete.
Click OK to confirm the deletion.
The default SSL_Server certificate is deleted.
Note
The default SSL_Server must be deleted because it is SelfSigned and this is not allowed in Snow Device Manager.
Right-click and click Import and name the certificate “SSL_Server”.
Click Browseand locate your certificate.
Enter the password for the certificate and click OK.
To restart all services, click Rest.All.
The service cache is cleared and the certificate is reloaded.