Manage deployments
A deployment serves as a carrier for a package, and is sent out to a device. The device receives the deployment, reads the package settings, and executes them. For more information about packages, see Manage packages.
This chapter describes how to create, change, and remove deployments for passcode, mail, Wi-Fi, and application settings in Snow Device Manager.
Create deployment
If a deployment was not created when the package was created, perform one of the following procedures to create a deployment:
Edit a package.
Create a new deployment.
Create a deployment by editing a package
Search for the package that you want to create a deployment for.
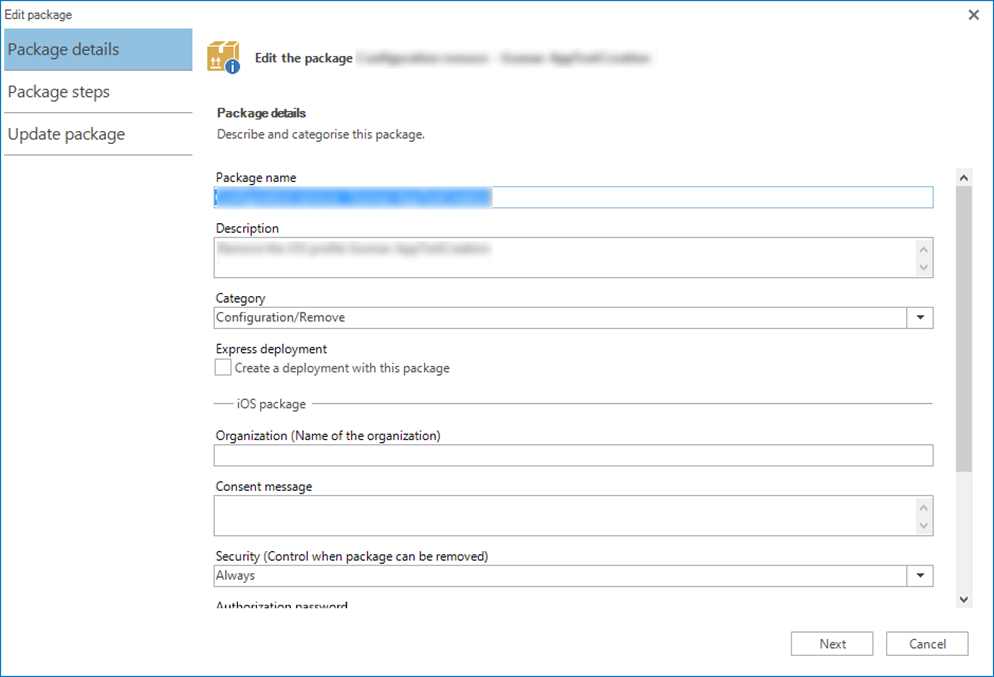
Double-click the deployment (or select the package and click Edit on the Edit tab).
The Edit the package dialog box appears.
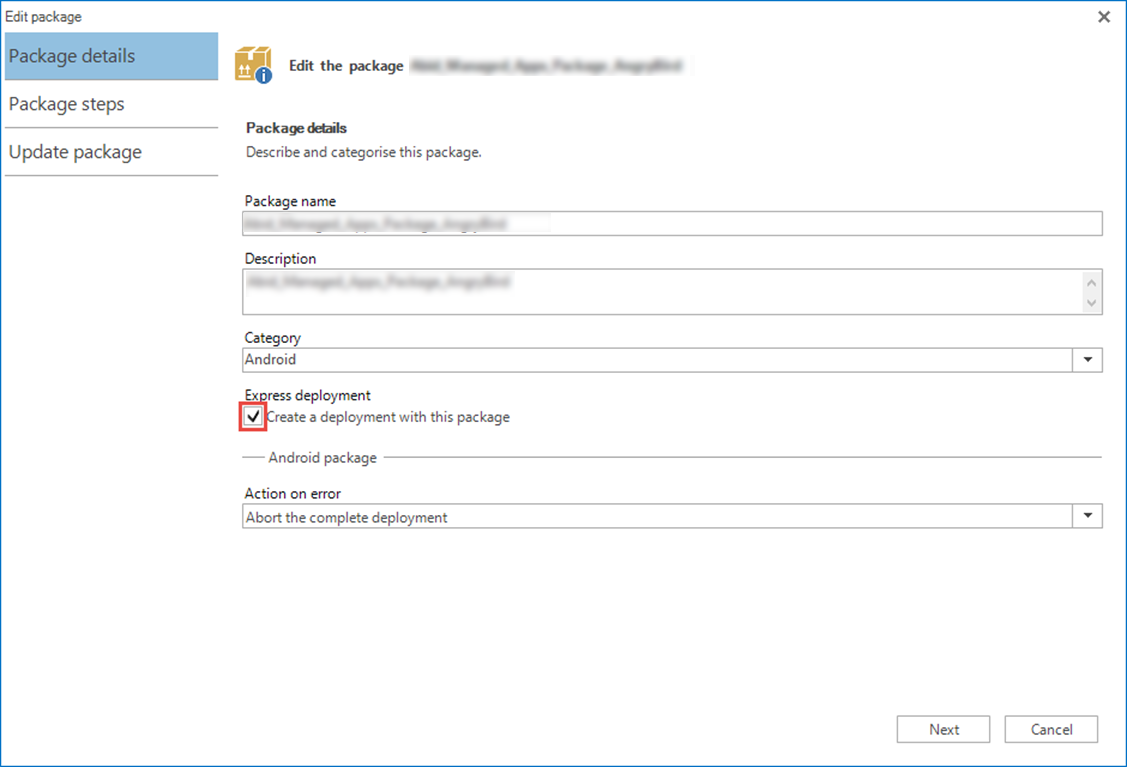
Select the Create a deployment with this package check box, and then click Next.
Click Update.
The package and the deployment are saved on the server.
Create a new deployment
On the Start tab, click New deployment.
The Add a deployment dialog box appears.
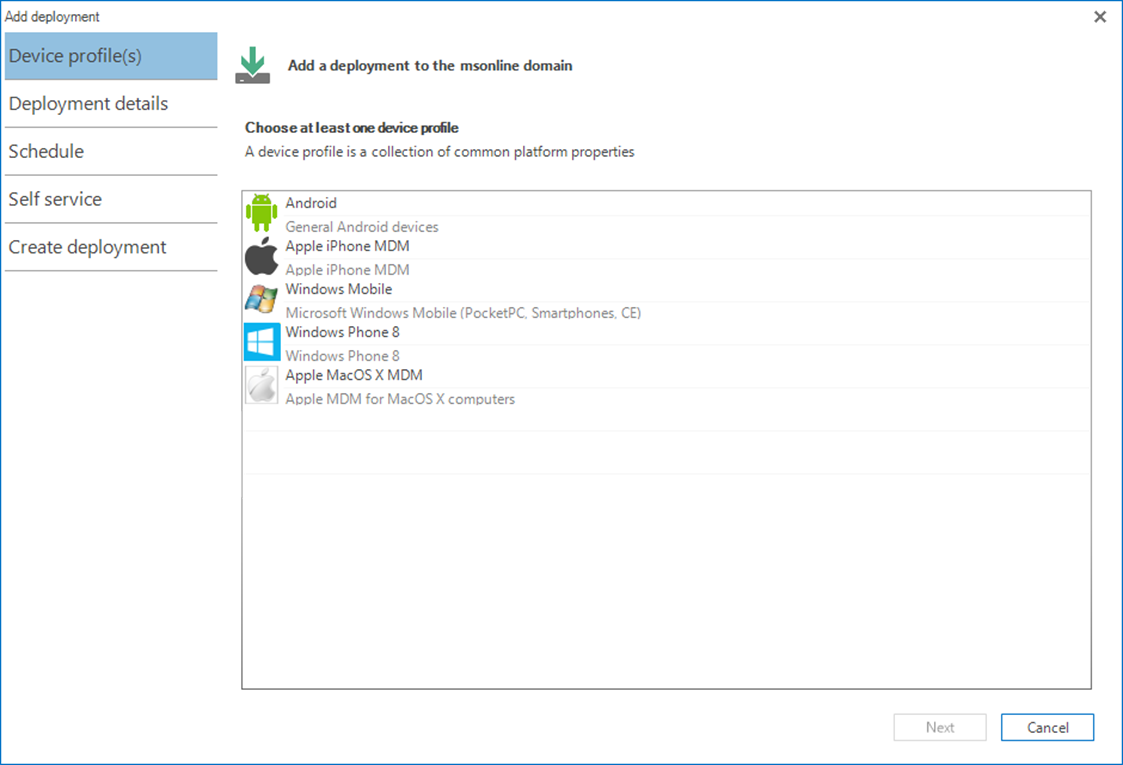
In the Device profile list, double-click a device profile (or select one or more device profiles, and then click Next).
In the Deployment name box, type a name.
In the Description box, type a description.
In the Category box, enter a category, and then click Next.
In the Choose packages list, double-click the packages you want to add (or click the plus sign (
 ) for the packages).
The packages are added to the Selected packages list.
Click Next
To run the deployment at a certain date and point of time, select Activate scheduling and then select a date and point of time.
Click Next.
To publish the deployment in the Snow SelfService portal:
Select Activate Self service.
Type a Title header.
Type a Teaser.
Enter a Category.
Select an Image.
Click Create.
The deployment is created, saved and scheduled.
View deployment settings and status
Find the deployment that you want to view the settings and status for.
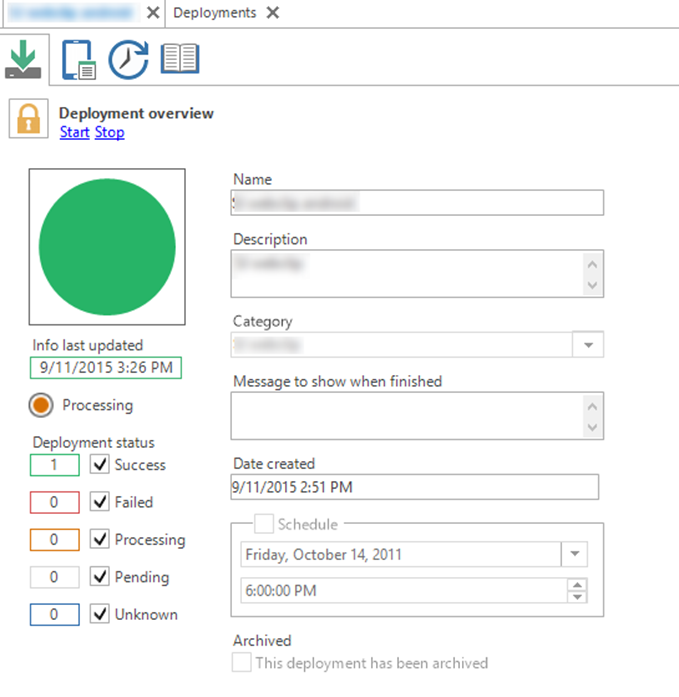
Double-click the deployment.
The deployment is updated. The settings and status for the deployment are displayed on the workbench according to the following tables
Page | Information on page |
|---|---|
Overview | Deployment status and other basic information. |
Devices | Devices added to the deployment. |
Self Service | Information about the package published in Snow SelfService. |
Log | All registered actions for the deployment. |
Deployment status | Description |
|---|---|
Success | SDM successfully sent the deployment to the device. |
Failed | SDM failed to send the deployment to the device. |
Processing | SDM is sending the deployment to the device. |
Pending | SDM is trying to connect to the device. |
Unknown | Unidentified error. The deployment is not compatible with the package. |
Add devices to deployments
There are two alternative procedures for adding devices to deployments:
Add devices to one or more deployments.
Add devices to one deployment.
Note
A device must be connected to a mobile network or WiFi to receive a deployment
Add devices to one or more deployments
Search for the devices that you want to add to the deployment.
Select the devices.
On the Edit tab, click Add device to deployment.
The Select deployments dialog box appears.
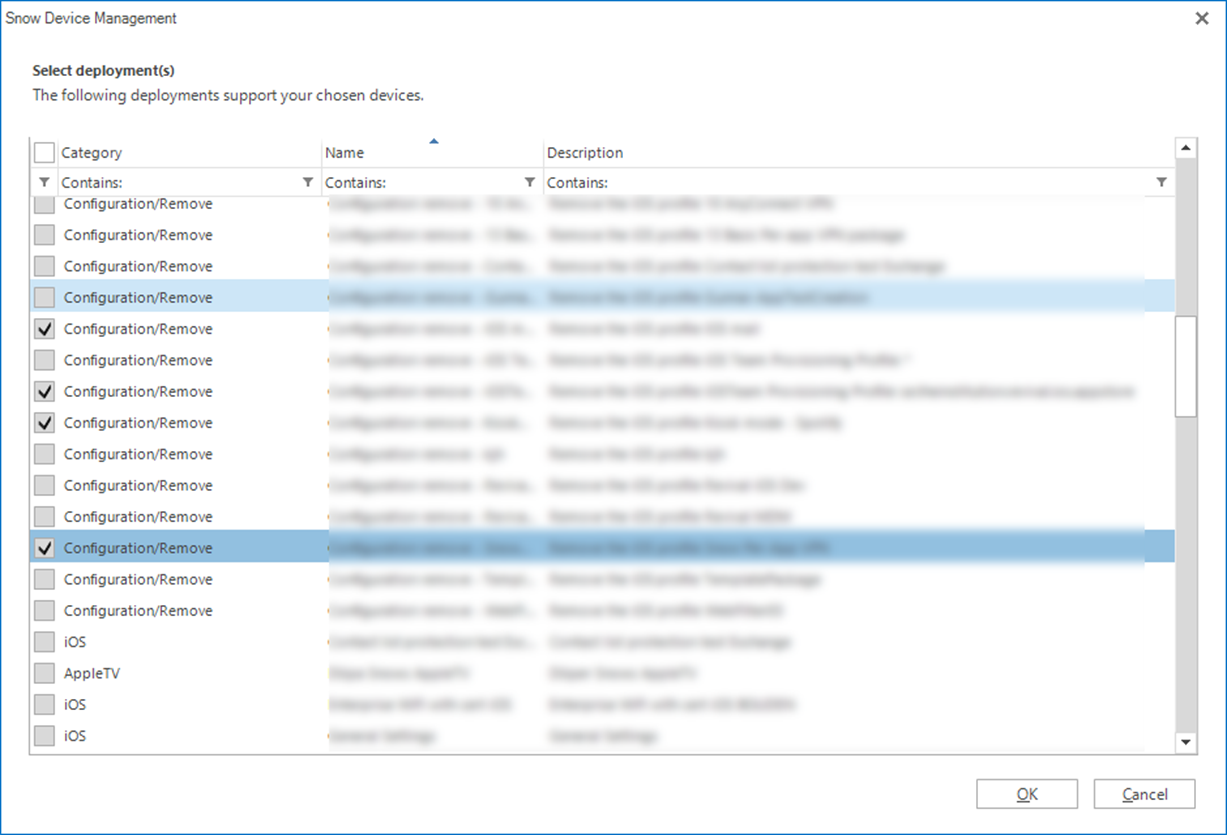
Select the deployments you want to add the selected devices to, and then click OK.
In the SDM Add devices to deployment dialog box, click Yes if you want to restart the deployments for the selected devices if they already have been added.
The devices are added to the deployments.
Add devices to one deployment
Find the deployment that you want to add devices to.
Double-click the deployment (or select the deployment and click Edit on the Edit tab).
The deployment is updated and the settings for the deployment is displayed on the workbench.
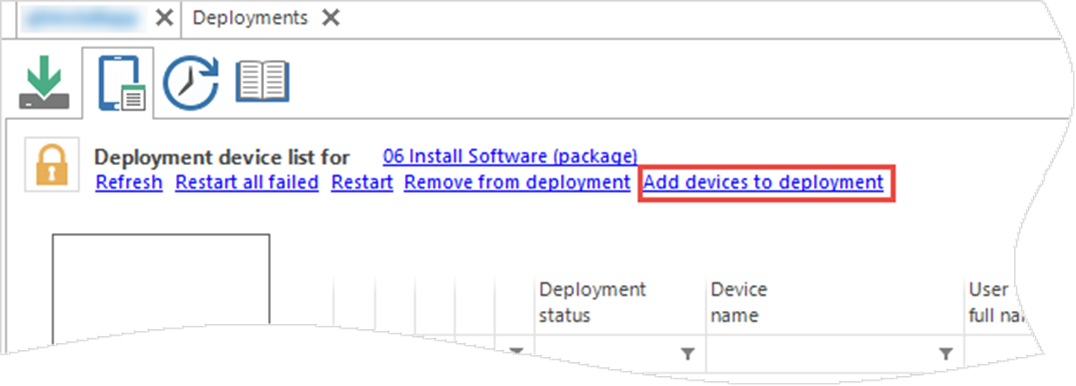
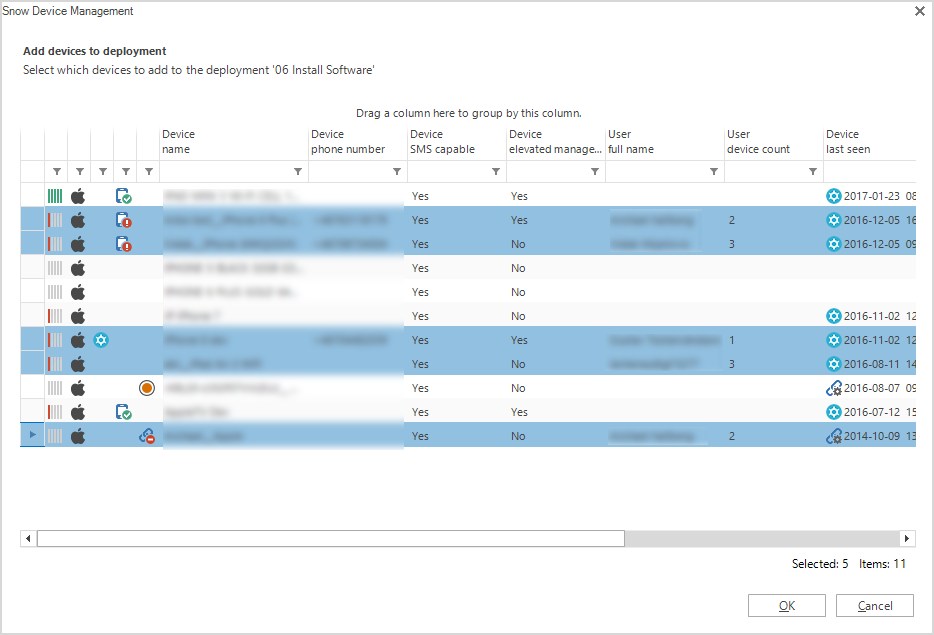
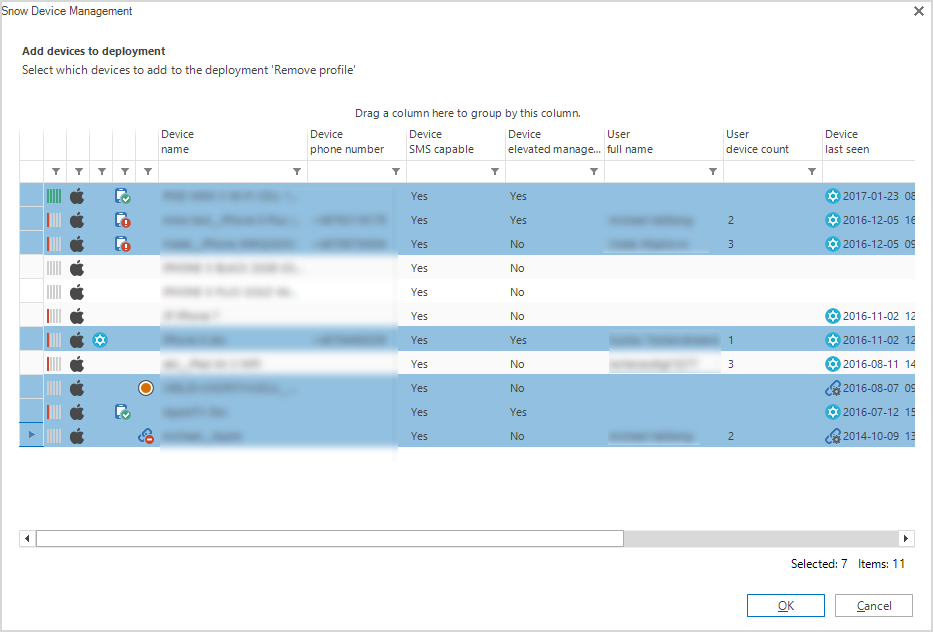
On the Devices page, click Add devices to deployment.
The Add devices to deployment dialog box appears.
Select the devices you want to add to the deployment, and then click OK.
The devices are added to the deployments and the settings are sent to the devices when the devices are online.
Edit package settings and restart deployment
The following procedure can for example be used to change the WiFi password setting when a company’s WiFi has been changed:
Find the package that you want to edit.
Double-click the package (or select the package and click Edit on the Edit tab).
The Edit the package dialog box appears.
Edit the settings, and then click Next.
Click Update.
Search for the deployment that is connected to the changed package.
Double-click the deployment (or select the package and click Edit on the Edit tab).
The Deployment workbench appears.
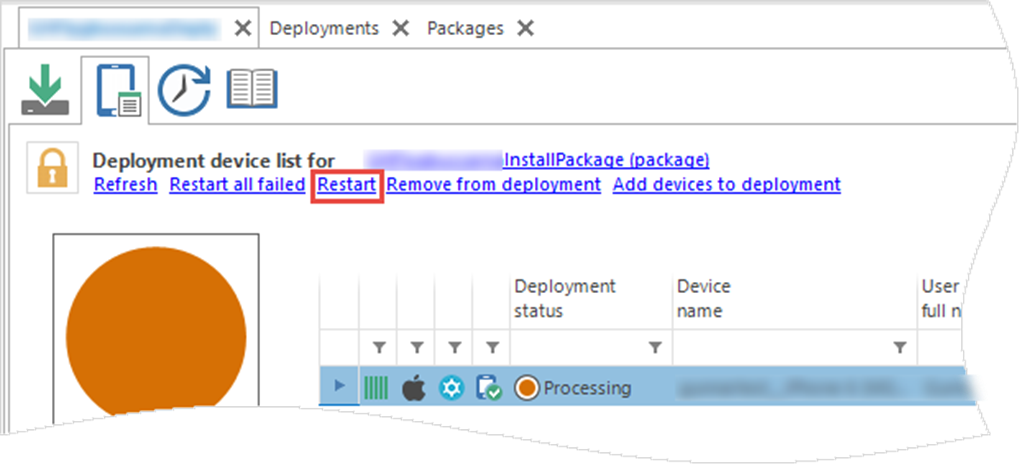
On the Devices page, select the devices you want to restart and click Restart.
The Start deployment dialog box appears.
Click Yes to restart the deployment.
Remove restriction from an Android device
If an Android device is added to a new deployment, the latest addition determines the settings for the device. Perform the following procedure to remove a restriction from an Android device:
Create a package and deployment according to Create package with the following settings:
In the Device profile list, select Android.
In the Choose a package step list, click the plus sign
for the for the package step.In the Restrictions dialog box, clear the checkbox for the restriction you want to remove.
The package and the deployment are created and saved.
Add the device to the deployment according to Add devices to deployments.
A package has a restriction that limits the user to install Google Play applications on the user’s device. The manager creates a new package and deployment where it is allowed to install applications from Google Play. When the user’s device is added to the deployment and the deployment status is “Success”, the user is allowed to install Google Play applications.
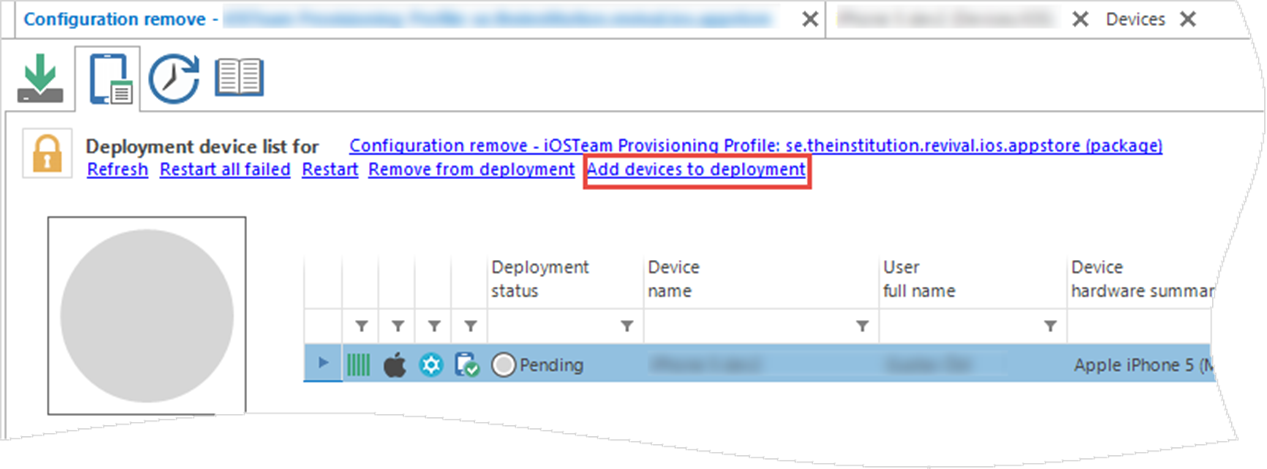
Remove profile from an iOS device
Every package installed on an iOS device becomes a profile on the device. There are two alternative procedures to remove a passcode, mail configuration or a restriction profile from an iOS device:
Create a “Remove profile” package.
Remove profile from iOS Configuration profile page.
Create a “Remove profile” package
Create a package and deployment according to Create package with the specific settings in the following table.
The package and the deployment are created and saved.
On the View tab, click Deployments.
Double-click the created deployment.
The deployment is updated and the settings for the deployment are displayed on the workbench.
On the Devices page, click Add devices to deployment.
The Add devices to deployment appears.
Select the devices you want to add to the deployment.
The devices are added to the deployments and the settings are sent to the device when the device is online.
Setting | Instruction |
|---|---|
In the Device profile list | Select iOS. |
In the Choose a package step list | Click the plus sign ( |
In the Remove Profile dialog box | In the Profile Type box, select the profile type of the profile to be removed. In most cases it will be a Configuration profile. In the Profile name box, type the identity of the profile. |
Remove profile from iOS Configuration profile page
Search for a device which is added to the deployment.
Double-click the device (or select the device and click Edit on the Edit tab).
On the iOS Configuration profile page, select the profile and then click Remove.
Click Yes to remove the profile.
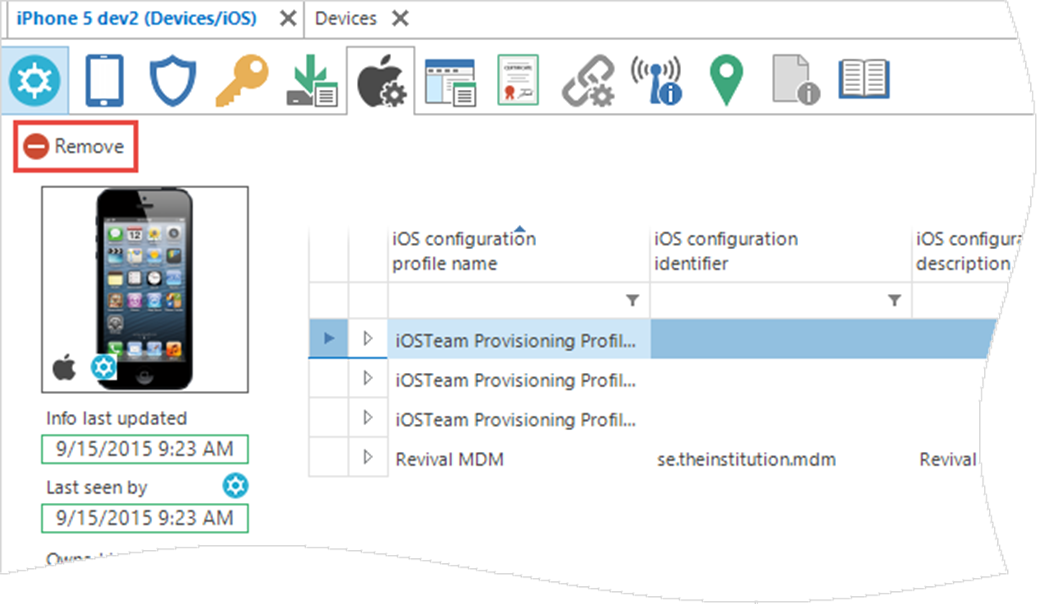
Click Save.
A package and deployment will be created automatically and the device will be added to that deployment.
On the Devices page, select the devices you want to add to the deployment.
Click Add devices to deployment.
The Add devices to deployment dialog box appears.
Select the deployment, and then click OK.The devices are added to the deployment.