Configuration of Tableau Online
The Snow Integration Connector for Tableau Online is used for finding the following information about an organization's Tableau Online account:
Number of users
Each user's assumed subscription license (based on the user's site role)
This information provides a general view, since a particular user may have been assigned a site role with more limited permissions than their actual license permits.
Login activity
Please note that login information is based on the last login date; thus, it may not fully represent user activity.
The configuration must be started and prepared according to SaaS connector configuration.
Prerequisites
The user name and password of an existing Tableau Online account holder with one of the following administrator site roles:
SiteAdministratorCreator
SiteAdministratorExplorer
Get the Tableau site and domain names
Log into the Tableau Online account and copy the domain/server address and the identifier from the URL for the Site name and Domain name as shown in the below examples:
Example 8.In the following URL examples, the domain, example01.online.tableau.com, network-address, or IP address 192.0.0.123 is the domain for your Tableau server installation, and the sitename, or examplecompanysitename is the identifier for the site.
Cloud-hosted:
https://domain/#/site/sitename/home
https://www.example01.online.tableau.com/#/site/examplecompanysitename/home
Self-hosted:
https://network-address/#/site/sitename/home
https://192.0.0.123/#/site/examplecompanysitename/home
This data is used to configure the connector.
Configure the Tableau Online connector
In the Configure section at the bottom of Connector Configuration: SaaS:
Enter into the respective text boxes the Tableau Online character strings that you copied in Get the Tableau site and domain names.
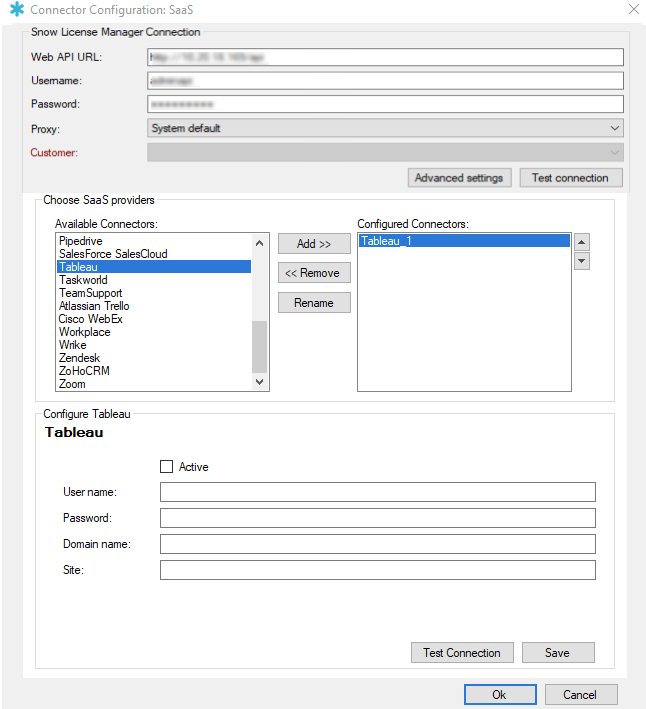
Select Test Connection.
If the connection is not successful, review the connection settings above, fix any mistakes, and try again.
Once the connection is successful:
Select the Active checkbox.
Select Save to save this configuration.