Configuration of Salesforce Sales Cloud
The Snow Integration Connector for Salesforce Sales Cloud is used to determine the number of registered Sales Cloud users.
The configuration must be started and prepared according to SaaS connector configuration.
Prerequisites
To configure the connector, your company’s Salesforce website address and the credentials for a Salesforce account, with the permissions described below, are required.
Permissions required for the creation of the app in the Salesforce website:
Administrative permissions that should be selected:
Customize Application, which includes:
Manage Custom Permissions
View Setup and Configuration, which includes:
View Roles and Role Hierarchy
General user permissions that should be selected:
Manage Connected Apps
Permissions required for the authorization of the app during the OAuth process in Snow Integration Manager:
Administrative permissions that should be selected:
API Enabled
View Setup and Configuration, which includes:
View Roles and Role Hierarchy
View All Users
Set up a Salesforce app
Log in to your company’s Salesforce website with the account with admin privileges.
Select the user name in the upper right corner of the website and select Setup.
On the Build > Create menu, select Apps.
Tip
Search for Apps to make it easier to find the menu option Apps.
In the Connected apps section, select New.
On the Create new connected app page:
In the Connected app name, enter the name of the app.
In the Contact email, enter your email address.
Select the Enable OAuth settings.
In the OAuth settings section:
In Callback URL, enter the following URL:
https://login.salesforce.com/services/oauth2/successFrom the Available OAuth Scopes list, add Manage user data via APIs (api) and Perform requests on your behalf at any time (refresh_token, offline_access) to the Selected OAuth Scopes list.
Select the Require Secret for Web Server Flow checkbox.
Select Save.
The new connected app is created and the management page for the app appears. The Consumer key and the Consumer secret are found on the management page. The information is used when configuring the connector.
Configure the Salesforce Sales Cloud connector
In the Configure section at the bottom of Connector Configuration: SaaS:
In the Client ID, enter the Consumer key generated in Set up a Salesforce app.
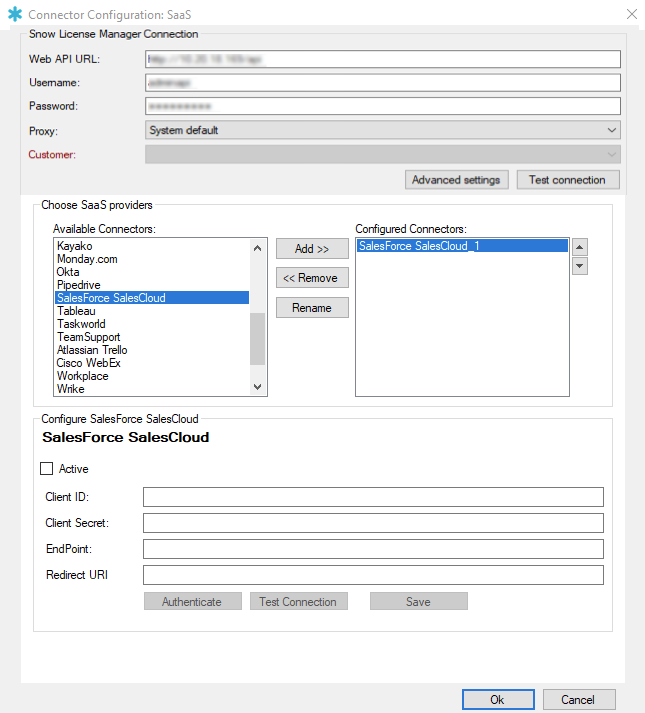
In the Client Secret, enter the Consumer secret generated in Set up a Salesforce app.
In the EndPoint, enter the web address of your company's Salesforce website.
Tip
You can find your company's Salesforce web address in the URL of your browser's address bar.
Example 7.https://YourDomainName.my.salesforce.com
https://YourDomainName.salesforce.com
In the examples mentioned, YourDomainName should be replaced with your company's Salesforce subdomain.
In the Redirect URI, enter the value for the Callback URL of the created app in Set up a Salesforce app.
Select Authenticate.
On the login dialog that appears, to authenticate the connector with your Salesforce account, follow the login procedure.
A dialog will inform you that the authentication was successful.
Note
If you are having issues with the login process, instead select Open default browser at the bottom of the login dialog. This opens the login page in your default browser instead.
After a successful login, copy the url in the address bar of the browser and paste it into the text box dialog that has appeared in SIM.
To verify the connection, select Test connection.
If the connection could not be established, verify that the connector has been configured according to Step 1 to Step 7.
To allow the data to be aggregated, select the Active checkbox.
Select Save.