This topic explains how to get started with Google Cloud Platform (GCP) in Commander.
Getting started with GCP
To manage your GCP resources with Commander, the following configuration is required:
- Create a service account for Commander to have programmatic access to GCP.
For more information, see Create a service account for Commander to access GCP.
- Ensure that the proper APIs are enabled for the project where the service account was created.
For more information, see Enable the required APIs.
- Give the service account permissions for all of the resources that you want to add as a single GCP cloud account in Commander.
For more information, see Grant permissions to the Commander service account.
- Optional: If Internet access is established through a web proxy server, integrate your web proxy server with Commander.
For more information, see Connect Public Clouds through Web Proxy Servers.
- Add your GCP service account to Commander as a cloud account.
For more information, see Add GCP Cloud Accounts.
- Assign access rights to admin users.
For more information, see Assign access rights to administrative users.
- Retrieve GCP billing data to ensure the accuracy of VM billing records.
For more information, see Retrieve GCP Billing Data.
Create a service account for Commander to access GCP
In the GCP console, you must create a new service account. The service account is required to authenticate and authorize Commander to access GCP services.
For more information on GCP service accounts, see Understanding Service Accounts in the GCP documentation.
To create a service account:
- In the GCP console, use the navigation menu to navigate to IAM & admin.
- In the header, select the project location for the new service account.
While the project location you choose has no impact on the service account's visibility and permissions, make sure to select a project that won't be deleted.
In the following example, Embotics Project X has been selected as the location for the new service account.
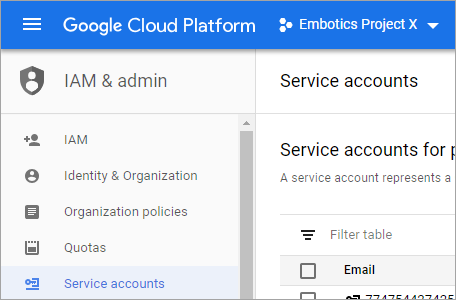
- In the left menu, select Service accounts.
- On the Service accounts page, click Create Service Account.
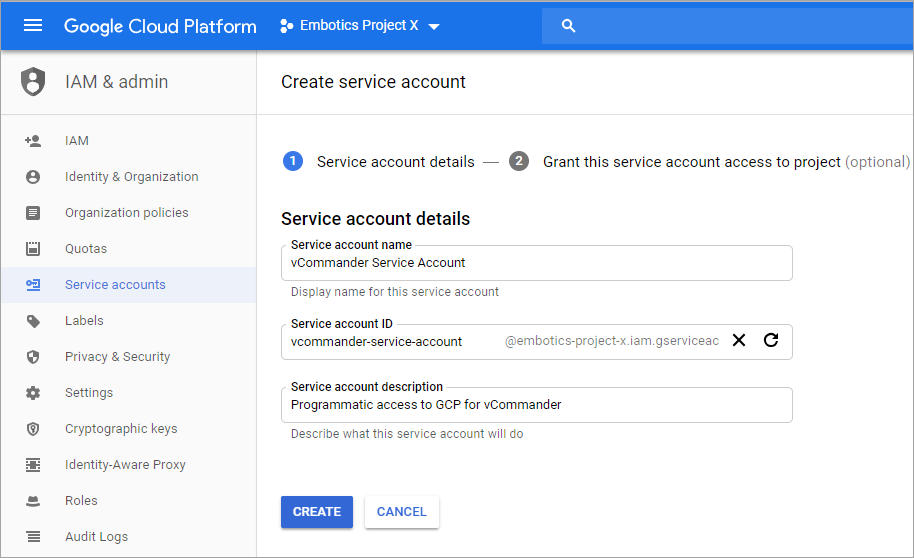
- On the Service account details page, do the following:
- Enter a distinct name, such as "Commander Service Account".
- Optionally, enter a description.
- Click Create.
The Service account ID field is automatically populated based on the name you enter.
- On the Grant this service account access to project (optional) page, click Continue.
You'll grant permissions in another context.
- On the Grant users access to this service account (optional) page, click Create Key.
- In the Create key (optional) section, keep the default key type, JSON, and click Create.
- If your browser prompts you to save the file, save it to a known location.
The JSON file contains the service account's private key. You'll use this JSON file when adding a GCP cloud account.
This is the only time when you can download this private key.
- Click Done.
Enable the required APIs
In the GCP console, ensure that the following APIs are enabled for the project where you created the service account for Commander:
- Cloud Resource Manager API — so that Commander can group resources by organization and project.
- Cloud Billing API — so that Commander can retrieve billing data.
To learn how to enable APIs for a project, see Enabling and Disabling Services in the Google Cloud documentation.
Grant permissions to the Commander service account
You must give the service account permissions for all of the resources that you want to add as a single GCP cloud account in Commander.
For more information on GCP service accounts, see Understanding Service Accounts.
If you use shared VPC networks, the Commander service account must have visibility of the host project. For more information, see Shared VPC overview in the GCP documentation.
To grant permissions to the service account:
- In a text editor, open the downloaded JSON file that contains your key.
- Copy the value for "client_email".
In our example, the value is
vcommander-service-account@embotics-project-x.iam.gserviceaccount.com. - In the GCP console, navigate to IAM & admin and select IAM.
- In the header, select a resource that you want to manage with Commander (such as an organization, folder or project).
In this example, the organization "embotics.com" is one of the resources we want to manage with Commander.
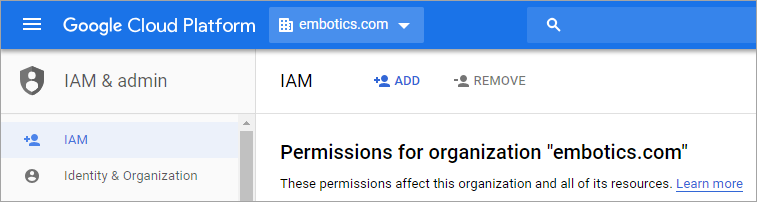
- On the IAM page, click Add.
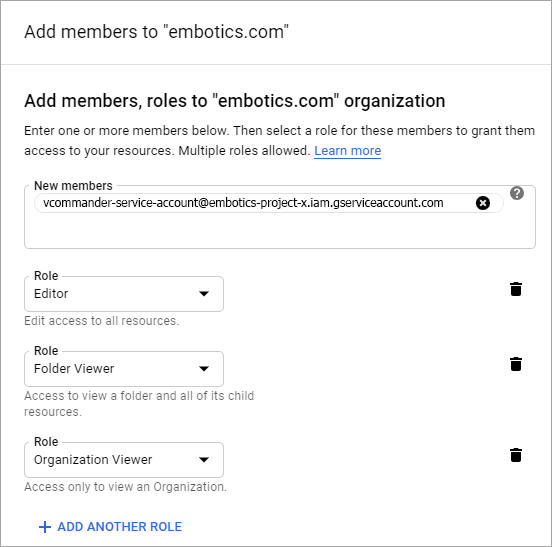
- In the Add members pane, paste the "client_email" text you copied into the New members field.
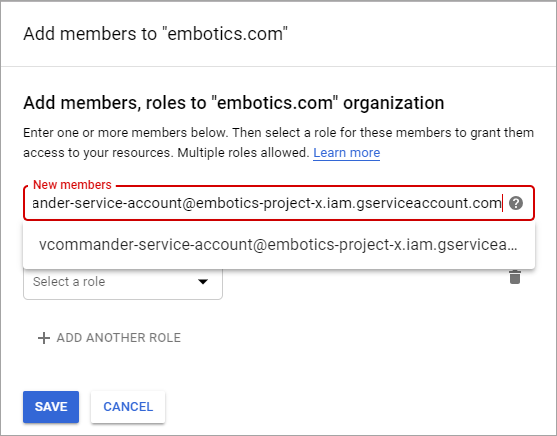
- Click Select a role and set the following permissions as required:
- Assign the Project Editor permission so that Commander can carry out actions on resources within the selected object (such as powering instances on and off).
- If you selected an organization, assign the Folder: Folder Viewer and Organization: Organization Viewer permissions so that the Commander views display GCP resources in their proper structural hierarchy, rather than in a flat list.
- To monitor VM performance metrics, the service account must have at least the Monitoring Viewer role.
- Click Add Another Role and assign other permissions on this resource as necessary.
- Repeat steps 4 through 8 for each resource that you want to be part of this GCP cloud account.
- Click Save.
What's next? Now you're ready to add a GCP cloud account.
Costing
Commander uses hard-coded costs for all projected GCP costs, such as service catalog costs, deployed service costs and reports with a projected cost model configuration. Hard-coded costs are provided for all supported service types and instance types, by region.
To make sure your price list is current, you can use the command workflow "Update Public Cloud List Prices". The workflow checks whether your price list is current, then updates the price list if necessary. You can configure this workflow to run on a recurring schedule, so that your price list is always current. By default, this workflow is disabled, but you can set how frequently it runs. For more information, see Update Public Cloud List Prices.
A cost model is automatically applied when a GCP account is added as a cloud account. The cost model enables you to add IT support costs, custom costs like backup costs and application software licensing costs to GCP billing data and to Commander's hard-coded costs. You can create additional cost models for different parts of your public cloud account.
The cost model and cost files allow users to see accurate estimated GCP costs when viewing cost details for existing resources.
For shared-core, predefined and memory-optimized instances, which are charged by the unit, the instance cost is displayed.
For custom instances, where costs are based on CPU and memory resource usage, the individual CPU and memory costs are displayed.
GCP costing differs from AWS and Azure costing in an important way. GCP charges aggregated CPU and memory usage costs, grouped by project and service type; GCP billing data doesn't include costs for individual VMs. This means that:
- Actual costs aren't displayed for GCP instances.
- Commander doesn't retrieve labels from GCP billing data.
- You may notice a few differences in the Cost Analytics Details tables when you're managing GCP. For more information, see Troubleshooting Cost Analytics.
Commander doesn't support costs for the following:
- Preemptible VMs (PVMs)
- Sole-tenant nodes
- Committed use discounts
- Premium application licenses (SAP, SQL Server)
- Disk snapshots
- Network traffic
- GPUs
- By default, Commander doesn't apply GCP's Sustained Use Discounts to estimated costs. If you want to change this behavior, edit the advanced system property
embotics.cost.gcp.discount. After editing this system property, to trigger a cost recalculation, edit the GCP cost model, and click Finish without making any changes. For more about editing advanced system properties, see Advanced Configuration With System Properties. GCP storage costs are per-region, but images don't have a region assignment. Commander displays image storage costs based on us-east1 region pricing.
For more information about costing for GCP deployments, see Costs for deployment configurations.
Snow Software does not own the third party trademarks, software, products, or tools (collectively, the “Third Party Products”) referenced herein. Third Party Product updates, including user interface updates, may not be reflected in this content.
