Commander uses a service catalog to make services available for your users to request and to publish services that can be deployed on multiple clouds.
A service is a container for IT assets that can be requested, approved, deployed, and completed as a unit. A service can consist of anything from a single resource, such as a VM, to a combination of service components, such as:
- Multi-cloud templates
- VM templates
- Amazon Marketplace AMIs
- Virtual service templates
- Cloud templates (CloudFormation templates, ARM templates, and GCP deployment configurations)
- OVA/OVF templates
- Custom components — These are used to represent both non-virtual assets (such as a phone) and tasks that modify existing assets (such as the installation of a database instance on an existing server).
Custom components differ from resources, such as VMs, and virtual service components in that once a request for a custom component is completed, the custom component isn't displayed or tracked in Commander or the Service Portal.
A service can be predefined (for example, as a vApp in vCenter). You can also configure a service from individual components in Commander, for example:
- A new hire service, which includes everything a new hire needs, such as a desktop machine, installed software applications, and a phone.
- A lab service, which includes everything required to set up a software testing lab environment.
Multi-cloud services
Multi-cloud templates are the recommended service catalog building block. With a multi-cloud template, you can publish a single service called a multi-cloud service, that can be deployed on multiple datacenters, hypervisors, or clouds. Multi-cloud templates also make it easier to keep the service catalog up to date.
For more information, see Add Multi-Cloud Services to the Catalog.
Component blueprints
Service catalog blueprints enable you to configure default settings for each component in your service catalog.
You can configure options related to:
- Infrastructure — Includes information such as name, description, customization specifications, and completion workflows.
- Resources — Includes information such as CPU count, memory, instance type, storage, and networking.
- Custom attributes — Includes metadata such as project code, and cost center.
- Groups — Includes information such as expiry, rightsizing, power schedule, and maintenance groups.
- Third-party integrations — Includes information such as Puppet classes and groups.
Blueprints also allow you to create component-specific request forms, which allow requesters to change the default settings that you configured.
Some settings don't make sense at the component level because they apply to the service as a whole. Deployment destination, ownership, and expiry date are examples of service-level settings. You configure these in the Form Designer when designing the form for a new service request. For more information, see Create New Service Requests.
Add services that users can request
Commander allows you to create a service catalog that's flexible and easy-to-use.
With the Service Catalog, you can:
- Categorize services to help users find what they need.
- Assign icons to services from a predefined list or use your own icons.
- Assign completion workflows to individual components or to the service as a whole. For example, create a service that includes several instances of a database node, and assign a completion workflow to install the same base OS for each database node.
- Configure a per-organization, per-user, or per-group naming convention for a service to assign to specific organizations, users, or groups.
Access: | Configuration > Self-Service |
Available to: | Commander Roles of Superuser and Enterprise Admin |
- Click the Catalog tab.
- On the Catalog page, click Add Service.
You can also copy an existing service as a shortcut.
To customize an existing service:
- Click the Catalog tab.
- On the Catalog tab in the List View, locate a service and click Edit. Note that it's not possible to add components to or remove components from a shared VM service. For more information, see VM Sharing.
If you navigate away from the service catalog wizard and come back, you're returned to the page you were editing. To discard your changes and return to the list of services, click Cancel.
Service Description page
On this page, you customize display options for the service.
- In the Name field, specify the display name for the service in the Service Catalog.
This name is used as the label for the Service section of the Request New Service form. Choose a distinctive Service Name to help requesters fill out the form.
- In the optional Description field, enter a description of the service.
Along with the Name field, the Description field is used in Service Catalog searches, so adding a description can help users find service catalog entries as well as make informed decisions when completing the request form.
- Select an available icon, or click Manage Icons to add an icon. See Manage icons for the service catalog for more details.
- To help users find this service in a long list, select one or more available categories, or click Manage Categories to add a category. See Manage Service Catalog categories for more details.
- If the service-level form elements such as Quantity and Expiry Date don't make sense for this service, you can clear Display service form when this service is requested to hide the service portion of the service request form.
Component Blueprints page
On this page, you can add the following types of service components:
- Multi-cloud templates
- VM or virtual service components, including Amazon Marketplace AMIs
- CloudFormation templates
- ARM templates
- OVA/OVF templates
- GCP deployment configurations
- Custom components
If you want to replace a template with a newer version, see Replace templates in the service catalog.
VM or virtual service components
To add a private VM template or virtual service template to the service:
- Click Add and choose VM Template, Image or AMI or Virtual Service Template.
- In the dialog that appears, select a component.
- vCenter and SCVMM: All components in a Service Catalog entry must belong to the same cloud account.
- Public Cloud: All components added to a Service Catalog entry must belong to the same region. If no templates are available for your public cloud account, you need to add images to your public cloud account first. You do this in the AWS Management Console, or Microsoft Azure Management Portal. Note that you can add only private images to the Commander Service Catalog. So, if you created an instance from a public image, you need to convert the instance into a private image before you can add it to the Service Catalog.
- (Optional; applies to vCenter and SCVMM only) To display VMs in the component list as well as templates, enable Allow VMs in Catalog.
- Optional: Use the Name field to customize the display name for this component in the Service Catalog.
This is the component name that a user sees when completing a service request form.
- Click Add to Service.
Use the tree or enter text in the search field to narrow the component list. The search field searches the Name and Guest OS properties for VMs, and the Name property for virtual services.
To add an Amazon Marketplace AMI to the service:
Some Marketplace AMIs are updated frequently. For easier maintenance, we recommend adding Amazon Marketplace AMIs to multi-cloud services, rather than single-cloud services. Commander doesn't automatically update Marketplace AMIs in your published services when a new version is available, so you must update your service catalog to point to the updated AMI. Using multi-cloud templates means that you can update Marketplace AMIs in a single location.
- Click Add and choose Amazon Marketplace AMI.
- If required, select one of the following from the Show menu to change the scope of the list:
- Favorites: Displays a list of favorite AMIs. Only the latest version of each AMI is available in the favorites list. You can customize the favorite AMIs list.
- Marketplace (latest version): Display only the latest version of each AMI.
- Marketplace (all): Display all Amazon Marketplace AMIs.
- If required, filter your search by:
- Entering text in the search field. The search is based on the AWS properties Name, Description and ID.
- Making a selection from the Platform list.
If Commander is unable to determine the platform for an AMI from the AWS API, the Platform is displayed as Unknown.
- Select an AMI from the list.
- Click View AMI details on AWS Marketplace to verify that you have subscribed to the correct AMI.
Important: If you haven't subscribed, service deployment will fail.
- Optional: Use the Name field to customize the display name for this component in the Service Catalog.
- Click Add to Service.
The Add Amazon Marketplace AMI dialog displays a list of Marketplace AMIs, sorted by name.
If you very recently installed Commander or added an AWS account as a cloud account, you may have to wait a few minutes for the list to be populated.
When you select an AMI, its details are displayed in the Details pane to the right. The ID property isn't shown in Commander. The Regions property shows whether an AMI can be deployed to all regions, or only to a subset.
This is the component name that a user sees when completing a service request form.
Multi-cloud templates
To add a multi-cloud template to the service, see Add Multi-Cloud Services to the Catalog.
CloudFormation templates
To add a CloudFormation template to the service:
- Click Add and choose CloudFormation Template.
- In the Add CloudFormation Template dialog, choose one of the following:
- Enter a publicly accessible URL in the URL field.
- Select Upload File and click Add. Browse to a template file. The file must be a text file whose format complies with the JSON standard. For more information, see Working with AWS CloudFormation Templates in the AWS documentation.
- Click OK.
The template is validated for proper syntax.
The component is automatically assigned the name CloudFormation, but you can customize the name as well as the description in a later step.
ARM templates
To add an ARM template to the service:
- Click Add and choose ARM Template.
- In the Add ARM Template dialog, choose one of the following:
- In the URL field, enter a URL that points to a valid ARM template. The URL must be accessible by the Azure account. The URL is stored in the Commander database and is supplied to Azure at deployment time, so that the most recent version of the template at that URL is always used.
- Select Upload File and click Add. Browse to a template file. The file must be a text file whose format complies with the JSON standard. Commander validates that the template is in JSON format, but doesn't make a call to Azure to validate the template contents.
- Click OK.
The component is automatically assigned the name ArmTemplate, but you can customize the name as well as the description in a later step.
GCP deployment configurations
To add a GCP Deployment Configuration to the service:
- Click Add and select GCP Deployment Configuration.
- In the Add GCP Deployment Configuration dialog, browse to a YAML configuration file or a ZIP file.
The maximum uncompressed size of a deployment configuration is 1 MB.
If you upload a YAML file, it must not import external files.
If you upload a ZIP file:
- The ZIP file must include:
- One YAML configuration file, at the root level. If your ZIP file contains multiple YAML files, Commander uses the YAML file whose name matches the name of the ZIP file.
- All Jinja or Python template files imported by the YAML configuration file.
- Any schema files for the templates, in JSON format.
- File and directory names must include only simple ASCII characters.
-
The ZIP file must use relative paths, not absolute paths (for example,
network/firewall.py, notC:/network/firewall.py). - You must replace all backslashes in references and imports with forward slashes. Commander doesn't support the use of backslash as path separator when uploading a ZIP file. For example, a YAML file with the following imports will generate the error "GCP deployment configurations must use forward slash as path separator":
imports:
- path: network\network-template.jinja
- path: network\firewall-template.jinja
When the imports section is edited as follows, validation is successful:
imports:
- path: network/network-template.jinja
- path: network/firewall-template.jinja - Click OK.
The YAML file and any schema files are parsed, and basic validation for size and schema imports is performed. Commander displays an error if any files imported by the YAML and schema files are missing.
The new Deployment Configuration component appears on the Component Blueprints page.
- Add more deployment configurations or custom components to the service as required.
OVA/OVF templates
To add a component based on an Open Virtual Format (OVF) or Open Virtual Appliance (OVA) template to the service, see To add OVA/OVF components:.
Custom components
To add an existing custom component type to the service:
- Click Add.
- Select the component type from the drop-down menu, or, if more than five custom component types already exist, select Custom Type from the menu, and in the Select Custom Component Type dialog, select a component from the list.
When you have finished adding components, click Close to return to the wizard.
The maximum number of components in a service is 15.
- If you choose the Blueprint model (recommended), you customize the Component form within the service catalog entry itself; the Form Designer is used only to customize the Service form. Component forms customized in the Form Designer are ignored for Blueprint service catalog entries.
- If you continue to use the Legacy model, form customization works as it did previously: you customize both Service and Component forms in the Form Designer. If you want to continue using the legacy model, see "Customizing Legacy Service Request Forms" topic in the vCommander User Guide for Versions 5.5—7.5. Note that the Legacy model is deprecated and will be removed in a future release. The Legacy model isn't supported for CloudFormation templates.
At this point, you can click Finish and continue editing the service catalog entry later if you wish. Or, click Next to customize the service. The remaining wizard settings vary by cloud account type. For more information, see the following topics:
- Add Multi-Cloud Services to the Catalog
- Add vCenter Services to the Catalog
- Add AWS Services to the Catalog
- Add Azure Services to the Catalog
- Add GCP Services to the Catalog
- Add SCVMM Services to the Catalog
Replace templates in the service catalog
If you've created an updated version of a VM template, AWS CloudFormation template, or an OVA or OVF template that's included in the service catalog (for example, if you've applied a patch), you can easily replace the old version with the new version.
Access: | Configuration > Self-Service > Catalog tab |
Available to: | Commander Roles of Superuser and Enterprise Admin |
- Locate the service in the list of services and click Edit.
- On the Component Blueprints page, select the template in the list and click Replace.
- For VM templates: The Available Templates and VMs dialog displays a list of templates from the same cloud account, with the same guest OS family. Select the newer version of the template and click Replace.
- vCenter: If the component was configured to be deployed as a linked clone, the selected template must have one or more snapshots.
- Public cloud: You must select a VM template in the same region as the original.
- For CloudFormation templates: The Replace CloudFormation Template dialog appears, allowing you to enter a URL or upload a file.
- For OVA/OVF templates: The Replace OVA/OVF Template dialog appears, allowing you to enter a URL or upload a file.
- The selected VM template has a different number of disks or network adapters.
- The selected VM template doesn't support one or more of the instance types configured for the component.
- The selected CloudFormation template's parameter list differs from the template it will replace.
- Click Finish to save your changes.
If the selected template's resource configuration differs from that of the template it will replace, a notice will prompt you to review the component's configuration. For example, the notice appears if:
If you click OK, in the page that displays, adjust the configuration as required for the new template. Click Help on this page for more information on any of the settings. If you click Cancel, no changes are made; the template isn't replaced.
Export lists of service catalog entries
Access: | Configuration > Self-Service > Catalog tab |
Available to: | All Commander Roles |
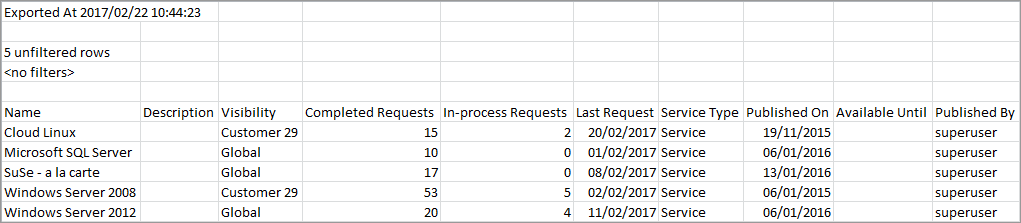
On the Catalog page, you can click to switch to the Table View. In the Table View you'll notice an Export icon at the top of the page. Clicking displays the Export Results dialog, where you can specify whether to export only the columns that are currently displayed or export all columns including the hidden columns.
You can select the columns you want to display. For more information, see Add, remove, or rearrange table columns.
You can enable the Include Count and Filters option to list the number of rows in the report. In the image below, notice that our report contains five rows.
Note that it's not possible to include a list of filters in this report. For example, if you filtered the list by the Development category and typed "Windows" in the filter box, and you enable Include Count and Filters, the report will contain only the filtered rows as expected, but the filters aren't listed in the report, and the row count always displays "unfiltered rows".
Manage component types for the service catalog
Custom components include both non-virtual assets (such as a phone) and tasks that modify existing assets (such as the installation of a database instance on an existing server). Creating custom component types allows you to add the same custom component to multiple Service Catalog entries, as well as centrally manage the cost and currency of these components. See also Costs and the service catalog.
Access: | Configuration > Self-Service |
Available to: | Commander Roles of Superuser and Enterprise Admin |
To create a custom component type:
- Click the Catalog tab.
- At the bottom of the Catalog page, click Configure > Custom Components.
- In the Manage Custom Component Types dialog, enter a unique type name.
- Optionally, enter a description.
- Enter an annual cost (a numeric value), select a currency, and click Add.
- Click Close.
You can also create component types from within the Add Service wizard.
You can now add this custom component to the service catalog.
To edit or delete existing component types:
- On the Catalog tab, click Configure > Custom Components.
- In the Manage Custom Component Types dialog, select a component type and click Edit or
 Delete.
 - Click Close.
You can't delete a component type that's currently used in the Service Catalog.
Manage icons for the service catalog
Assigning icons to services makes it easier for users to find the services they need in the Service Catalog. Commander includes several icons by default, but you can add your own, as well as remove default icons.
Access: | Configuration > Self-Service |
Available to: | Commander Roles of Superuser and Enterprise Admin |
- Click the Catalog tab.
- At the bottom of the Catalog page, click Configure > Icons.
- In the Manage Service Icons dialog, do the following:
- To add an icon, click Add, navigate to the icon you want to add, select it, and click Open.
Files must be no more than 1 MB in size and must be GIF, JPEG, or PNG files. They should be 48 x 48 pixels for best results. - To delete an icon, select an icon in the list and click Delete. If the icon you select is assigned to one or more services, a message informs you that these services will revert to the default icon. Confirm the deletion.
- Click Close.
You can also manage icons from within the Add Service wizard.
Manage Service Catalog categories
Assigning categories to services makes it easier for users to find the services they need in the Catalog. You might want to categorize services by operating system, geography, or organizational structure. You can assign multiple categories to a single service.
When you filter the Catalog by category, only services matching all selected categories are retrieved.
Commander includes several categories by default. You can also add, delete, or rename categories.
Access: | Configuration > Self-Service |
Available to: | Commander Roles of Superuser and Enterprise Admin |
- Click the Catalog tab.
- At the bottom of the Catalog page, click Configure > Categories.
- In the Manage Categories dialog, do the following:
- To add a category, in the Category Name field, enter text and click Add.
- To change a category name, select a listed category, and click Rename; in the Rename Category dialog, type a new name and click OK.
- To delete a category, select a category in the list and click Delete. If the category you select is assigned to one or more services, a confirmation message appears. Confirm the deletion.
- Click OK.
You can also manage categories from within the Add Service wizard.
Provide friendly names for instance types
Providing friendly names for public cloud instance types helps users:
- Decide what instance types to make available when configuring a service catalog entry
- Select an appropriate instance type when requesting a service
- Better understand a VM's resources when viewing the General section in the VM's Summary tab
- Decide whether to apply a rightsizing recommendation
Access: | Configuration > Self-Service |
Available to: | Commander Roles of Superuser and Enterprise Admin |
- Click the Catalog tab.
- At the bottom of the Catalog page, click Configure > Instance Type Names.
- In the Edit Instance Type Display Names dialog, select the cloud account type.
- Enter friendly names for the instance types as required and click Save.
You can also manage instance type names from within the Add Service wizard.
Permanently remove services from the Service Catalog
Access: | Configuration > Self-Service > Catalog tab |
Available to: | Commander Roles of Superuser and Enterprise Admin |
Removing a service from the catalog means that the template or VM is no longer available for selection by any user and has been removed permanently from the Service Catalog. This removal is different from temporarily disabling access to a service with the "Do not publish" setting on the Visibility page of the wizard.
Removing a service doesn't mean that you're removing its service components from inventory or deleting them from disk. Components of removed services are still part of the inventory in Commander (see also Remove VMs or virtual services from inventory and Delete Deployed Services).
To permanently remove a service, go to the Service Catalog, click Remove for the service, and confirm the deletion.
Repair corrupt service catalog entries
Access: | Configuration > Self-Service > Catalog tab |
Available to: | Commander Roles of Superuser and Enterprise Admin |
When a component, snapshot, network zone or credential used in a service catalog entry is deleted, the service catalog entry is labeled as corrupted, with the following icon displayed in Commander:
![]()
The Issues column in the Catalog Table View also displays a warning icon, with a tooltip to indicate the status.
On the Components page of the Edit Service wizard, the following error is displayed:
"Component <name> has been removed. This service can not be requested until it's repaired."
A corrupt service isn't displayed to users requesting a service in the Service Portal.
For multi-cloud services, the Manage Multi-Cloud Templates dialog may display one of the following statuses for templates requiring repair:
- A degraded multi-cloud service is one in which at least one VM template is still deployable. Any services containing a degraded multi-cloud template are also marked as degraded. Users can still request degraded services; they appear exactly as any other service in the catalog.
- A corrupted multi-cloud template is one in which no VM templates are deployable. Users don't see corrupted services in the catalog.
To repair a single-cloud service catalog entry:
- Restore the missing component, network zone or credentials, or
- Remove the component, network zone or credentials from the service catalog entry.
To repair a multi-cloud service catalog entry:
- Restore or remove the network zone or credentials.
- Remove the component from the multi-cloud template and if necessary, add a replacement component to the multi-cloud template. Restoring the original component doesn't repair a multi-cloud service.
